How to Pressure Wash a Wood or Composite Deck
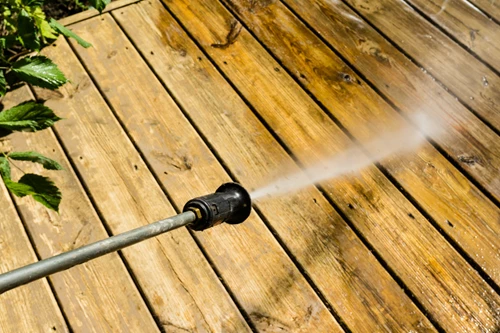
Routine pressure washing will keep your deck free of dirt buildup, dislodge leaves and other debris stuck between boards, and help to maintain the beauty -- and safety -- of your deck. Not only can leaves and other debris pose slipping hazards as they decompose, but they can also trap moisture that causes staining and promotes rot which could require you to replace the deck boards sooner than expected.
Ideally, you would pressure wash your deck at least once a year to remove algae and mildew and prevent other conditions that can harm your deck.
If you have a wood deck, you should also pressure wash it before applying any stain or sealer. This will help the stain and/or sealer adhere better to the deck boards and prolong protection against the elements.
Here is everything you need to know about using a power washer on your deck, including how much pressure to use on a composite vs. wood deck.
What Kind of Pressure Washer Do I Need and How Much Do They Cost?
Pressure washers are powered in one of three ways: electric (plug-in), gas, or battery. Gas-powered models are the most powerful, while electric models are the most affordable. Battery-operated washers may seem convenient, but since most pressure washers still require a connection to a garden hose, the freedom from gas or an electrical cord isn’t always a major advantage.
The average cost to rent a pressure washer is about $65–$75 per day. However, you can buy an electric pressure washer (around 1800 PSI) for as little as $100. Gas-powered models that produce 3000+ PSI start at approximately $350.
Beyond cost and power, consider what features are important to you. Some common options include:
- Soap reservoir – Allows you to apply soapy water directly through the pressure washer’s wand.
- Self-drawing capability – Some models can draw water from a bucket, pool, or lake, making them ideal for remote tasks. These are often battery-powered.
- Self-lubricating pumps – These allow the pressure washer to use hot water for extra cleaning power. Most residential pressure washer pumps are cooled by tap water and can be damaged if used with hot water.
- Specialized accessories – Attachments like driveway cleaners and undercarriage adapters can make specific cleaning tasks much faster and easier.
How Many PSI Do I Need to Pressure Wash a Deck?
When pressure washing a wood deck, always start at a lower pressure—around 1800 PSI—and gradually increase it until the washer effectively cleans the surface. Exceeding 2500 PSI increases the risk of stripping paint or stain from the wood. Even if your goal is to remove old finishes, using pressure above 3000 PSI can permanently damage the wood fibers, making it harder for the surface to hold new finishes.
PSI is only part of the equation. The spray tip or nozzle you use also affects the force applied to the deck. A narrower spray pattern concentrates the water’s force, while a wider pattern disperses it over a larger area. Begin with a broad spray pattern using a fan tip attachment, ensuring it is at least as wide as the board you are working on.
The distance between the nozzle and the surface also impacts the pressure. Holding the nozzle just a few inches from the wood—even with a lower PSI—can still cause damage. Additionally, the wand movement plays a crucial role. Keeping the spray focused on one spot for too long can gouge the wood fibers. Instead, start with the nozzle a couple of feet away, slowly move it closer until you find the "sweet spot," and always keep the wand moving back and forth to avoid damage.
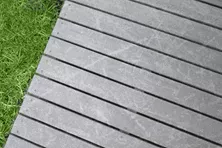
It's important to note that composite decking from premium manufacturers like Trex is designed to be low-maintenance and does not require pressure washing. Instead, it can be easily cleaned with soapy water and a standard garden hose. In fact, using a high-powered pressure washer could void the warranty on many composite decking brands. Always check the manufacturer's cleaning recommendations before using a pressure washer.
What Deck Cleaner Should I Use in My Power Washer?
Cleaners come in a variety of formulations with different performance claims. Some are detergents, others are bleaches, and still others are chemical solutions designed to react with certain woods. There is no one clear answer as to what cleaner you should use.
Your best deck cleaner options depend largely on the type of material used in the construction of the deck. Whichever cleaner you select, be sure to read the manufacturer’s directions carefully, and follow them to the letter. Then let the pressure washer do its job. A pressure washer uses less water than a conventional hose and nozzle. Removing the residue of the cleaner is far easier with a pressure washer than with a garden hose because it forces the cleaner out of the wood, rather than merely diluting it.
It's important to note that composite decking from premium manufacturers like Trex is designed to be low-maintenance and does not require pressure washing. Instead, it can be easily cleaned with soapy water and a standard garden hose. In fact, using a high-powered pressure washer could void the warranty on many composite decking brands. Always check the manufacturer's cleaning recommendations before using a pressure washer.
How to Power Wash a Deck
1. Scrub the Deck with a Bristle Brush
A stiff bristle brush should be part of your deck cleaning arsenal. For optimal results, the brush should have synthetic vs. natural bristles, because many cleaners will deteriorate natural fibers. A good synthetic bristle will last many years. The brush should have a handle long enough to reach all the places you need it to reach. Rarely will one brush work for all your needs, so if you need multiple brushes, get them. The right tool for the job can make all the difference.
Scrub the deck. Sometimes lightly watering down the deck can assist you in applying and spreading the cleaning solutions. Many solutions should not be allowed to dry on the wood so periodic spraying/misting may be required. Depending on how dirty the deck is, you may see immediate results. More often, the cleaner must remain on the deck for a short time to break down the embedded contaminants.
Once you have scrubbed the entire deck, you are now ready for rinsing. Again, a conventional hose and nozzle may work. But, if you will use a pressure washer, this next section will instruct you on the correct techniques. Note: Sometimes applying pressurized water will raise wood fibers at the surface, even when you’re being cautious. These raised fibers can be removed easily.
2. Power Wash the Deck
Before you pull the trigger of the wash wand, be sure it’s pointing away from the deck surface and away from anything else it could harm, including windows and people. The water that emerges from the tip is called a “fan,” and you can change the fan size by changing tips, which are rated in degrees denoting the angle. A zero-degree (0o) tip will typically produce a straight stream, but you never want to apply a straight stream to wood. A 40o to 60o tip is standard for cleaning a deck. Bring the fan to the surface where you want to clean the deck.
The Sweeping Method
Begin “sweeping” the deck from the house side out. Use a sweeping motion parallel to the wood grain and keep the length of the sweeping motions consistent to avoid lap marks. The goal in sweeping a deck with a pressure washer is to remove the dirt without leaving pressure marks. Applying too little pressure or holding the fan too far above the deck will result in a less clean surface. Applying too much pressure or holding the tip too close to the wood can result in marring the surface. In sweeping the surface, you want to apply the same pressure over the full length of each stroke.
The Feathering Method
“Feathering” is a technique that may help you mask the starts and stops of the sweep. With this technique, you want to overlap the areas previously swept, making sure that the point where the nozzle is closest to the wood begins at the point where the sweep ended on the previous stroke. Always working with the grain or the length of the board, this technique requires more strokes and is slower, but it does an exceptional job. It also ensures that as much of the cleaner is removed/diluted as possible. Excess cleaner left on the deck surface can have long lasting and detrimental effects. Feathering is the most efficient method for using a pressure washer on a deck surface.
The Long Sweep Method
The “long sweep” is another method. Using this method, you bring the fan to the surface and walk the fan along the length of the board. The tip should be at the same distance from the deck from the beginning of the stroke through the whole length of the board. This method may require several passes. This method works fine for decks with no railings or obstacles, where starting and stopping can be problematic. If you use this method with railing structures, you will leave behind a line across the surfaces where the fan stopped. These lines will be difficult to remove as more pressure will have to be applied, possibly damaging the surface.
Pressure Washing Corners
Corners can sometimes be a challenge, because the water has no direct place to travel and often ends up in the face of the user. Airborne debris and chemicals can be harmful. Always wear appropriate body protection. When approaching a corner, engage the fan and bring it into the corner first, spraying the debris out. Try not to work yourself into a corner, always work out of a corner. In doing so, you may have to spray across the grain for a short time. This is fine as long as the distance is greater and pressure is lower against the grain than with the grain.
3. Let the Deck Dry and Apply Sealer or Stain if Desired
Once you have completed the whole deck, put away the equipment and allow the deck to dry. Decks look very different after they dry. Small imperfections that may have gone unnoticed when the deck was wet can become apparent. Also, raised fibers will be virtually impossible to remove from a wet surface. If the topcoat (sealer or stain) you have selected is a one-day product to be applied after washing, but before the deck dries, it is recommended that you allow the surface to dry for at least 24 hours. Once the deck has dried, inspect your work. The surface should have no lap marks, minimal raised fibers, and clean wood. The surface should be consistent, with no areas left unwashed and no areas over-washed. If your deck looks like this, pat yourself on the back for the fine job. The next step is to prepare for finishing with a sealer or stain.
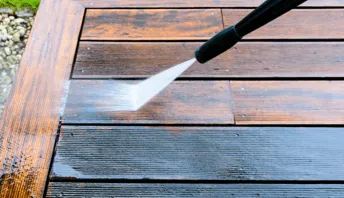
Use a cleaning solution to scrub your dirty deck before removing the suds and dirt with a pressure washer.
More Deck Care Resources
Get more tips for caring for your deck:
Deck Replacement & Repair Costs
Whether you’ve decided to tear down and rebuild your deck or if you’re only looking to repair smaller portions, you can find benchmark prices here.
How to Clean Outdoor Patio Cushions
Keeping your outdoor furniture cushions clean helps extend their life and makes your deck or patio area look nice. Learn how to clean outdoor cushions.
Capped Composite Decking
What is capped composite decking? It's a great option if you like the look of wood but not the maintenance. Learn about capped composite at Decks.com.
Waterproof Decking Materials & Options
Did you know you can ensure the space under your deck stays dry, or even waterproof your decking boards? Explore all waterproof decking options at Decks.com.
Hurricane Ties: Uses and Installation
Hurricane ties provide your deck with additional stability against high winds and rain. Learn how to utilize and install hurricane ties on Decks.com.
More Helpful Resources
Explore Articles by Topic
Footings
Information related to installing frost footings for decks
Framing
Learn structural framing methods
Decking
Learn about wood and composite decking materials
Stairs
An in-depth look at the complex issue of how to build stairs
Railings
How to install guardrails and handrails to meet IRC code

Features
An overview on water drainage, benches, planters and lights
Design
The basics of deck design
Planning
Learn about permits and working with contractors

Porches & Patios
Build a covered deck to enjoy all seasons
Ledger
Proper attachment techniques
Care
Maintain your deck to maintain your investment
Materials
An overview on water drainage, benches, planters and lights
How to Remove Scuffs and Scratches from Composite Decking
Removing scuffs and scratches can help make your composite deck look like new. Learn how to fix and prevent your composite deck from future scratches.
What is Wet Rot and How Do You Treat It?
Wet rot occurs when water or high moisture levels cause wood to decay. Learn how to recognize the signs and causes of wet rot and how to treat it.
Deck Replacement & Repair Costs
Whether you’ve decided to tear down and rebuild your deck or if you’re only looking to repair smaller portions, you can find benchmark prices here.
Is Trex Decking Worth the Investment? Expert Insights and Reviews
Discover why Trex decking is worth the investment. Learn about its durability, low maintenance, eco-friendliness, and the long-term value it adds to your home.
Pressure Treated Wood: Types, Grading Standards & More
Wondering if pressure treated wood is right for your project? Learn more about the different types of pressure treated lumber as well as how long they last at Decks.com.
Rhino
Rhino composite decking is manufactured by Master Mark Plastics in Paynesville, MN.
Explore Articles by Topic

Footings
Information related to installing frost footings for decks

Framing
Learn structural framing methods

Decking
Learn about wood and composite decking materials

Stairs
An in-depth look at the complex issue of how to build stairs

Railings
How to install guardrails and handrails to meet IRC code

Features
An overview on water drainage, benches, planters and lights

Design
The basics of deck design

Planning
Learn about permits and working with contractors

Porches & Patios
Build a covered deck to enjoy all seasons

Ledger
Proper attachment techniques

Care
Maintain your deck to maintain your investment

Materials
An overview on water drainage, benches, planters and lights


