How to Install Decking Over Existing Concrete Slab, Patio, or Porch
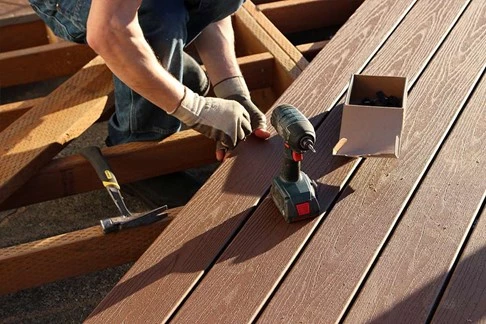
Upgrading an outdoor living space from an existing concrete slab or patio to a beautiful deck is a project well-suited for DIYers. The satisfaction level of the transformation will outweigh the effort and cost. Furthermore, depending on the desired height of the finished walking surface, a building permit may not even be required, reducing the project's costs and complexity. Let’s dive into project considerations before we review installation options and their pros and cons.
Can You Build a Deck Directly on Concrete?
Yes, a deck can be built on concrete, providing a practical solution for utilizing an existing concrete patio. Building a deck over concrete allows you to create an attractive outdoor space with improved aesthetics and functionality. This approach is suitable for homeowners looking to refresh their outdoor area without the hassle of removing existing hardscapes.
To properly install a deck over concrete, start by ensuring the concrete surface is clean and level. Use spacers or sleepers to create a gap between the concrete and the decking material, which promotes drainage and prevents moisture-related issues. Next, securely attach the decking boards to the sleepers using appropriate fasteners, ensuring all materials are weather-resistant. This method of decking over cement not only enhances the appearance of your patio, but also extends its lifespan.
Can You Put Trex Decking On Top of Concrete?
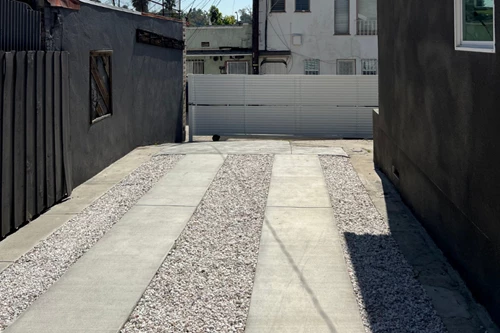
Read the installation instructions for the composite decking product. Pay close attention to the minimum air space required under the decking. You may discover you need three or more inches of free-flowing airspace under the decking.
Because concrete and deck boards of all types, including composite deck boards, expand and contract at different rates, deck boards should never be applied directly to concrete. Ever. A buffer of framework needs to elevate and support the deck boards, as well as allow for drainage between and beneath the deck boards. The framework also provides a structure to attach the deck boards to. With that established, let’s review three common framework options.

However, determining if you can lay composite decking over a concrete patio requires a closer look at other considerations. In some instances, you may have better options for materials that go over a concrete slab, and some installations may involve more work than others.
Determine the Condition of the Existing Concrete Slab: Cracking and Flaking

Cracking:
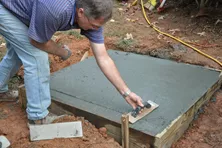
Concrete patios, or “slabs”, are typically constructed on an area in which the soil has been graded/smoothed. Wooden forms are installed, then the concrete is poured and smoothed. Occasionally, wire mesh is placed just above the soil before pouring the concrete, or synthetic fibers are added to the wet concrete during mixing, both of which add strength and provide resistance to cracking. However, some soils, such as those high in clay content, can be unstable, leading to settling and cracking of the slab despite efforts to reinforce the slab.

Puddling:
If the slab was not poured with care originally, and/or settling over time has occurred, a depression or low spot in the slab can develop – often accompanied by cracking. These depressions can cause water to puddle, creating an undesirable breeding ground for insects and algae growth.

Spalling:
Additionally, particularly in areas subject to frequent and severe freezing, surface spalling or flaking of the concrete can also occur resulting in an unsightly appearance.
Unfortunately, all the above conditions can create a combination of trip and/or slip hazards.
Should You Repair or Remove Concrete When Building a Deck Over Cement?
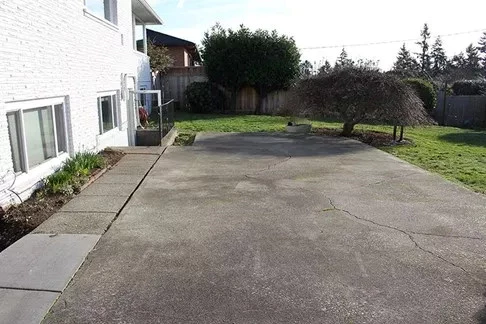
Before building a deck over your existing slab, you’ll need to evaluate its condition. Does it slope, have structural cracks, or look weathered due to spalling? Depending on the severity, you’ll need to decide whether to repair the slab or remove it entirely. Here's a closer look at both approaches.
Minor surface issues can be addressed with concrete leveling compounds. These handy products fill in puddled areas, cracks, and spalling, creating a smoother surface to support your deck. It's worth considering this method if your slab is generally sound and hasn't shifted significantly.
Repairing the Concrete
Pros of Repairing:
- DIY-Friendly: Leveling compounds are widely available and require minimal tools, making the task approachable for DIY enthusiasts.
- Cost-Effective (in some cases): If the existing slab only has minor imperfections, leveling might cost less compared to complete removal.
Cons of Repairing:
- Risk of Future Movement: Even after leveling, the concrete could settle or crack further down the line, impacting the stability of your deck.
- Additional Time and Effort: Applying and curing the leveling compound adds time to your project.
Removing the Slab
For heavily damaged, unstable, or completely uneven slabs, removal is often the best option. A "clean slate" eliminates lingering issues and ensures a solid foundation for your new structure.
Pros of Removing:
- Fresh Start: Removes potential risks associated with slab settling or unevenness, ensuring your deck sits perfectly stable from day one.
- Long-Term Results: Eliminates guesswork, making your project more durable over time.
Cons of Removing:
- Labor-Intensive: Breaking up concrete, even with tools, is a physically demanding process.
- Disposal Challenges: Disposing of concrete debris is often difficult and can incur additional costs.
Once you've decided whether to repair or remove the slab, you're ready to move on to the exciting step of deck construction.
Ultimately, you must decide if preparing or repairing the slab is more advantageous than removing part or all of it.
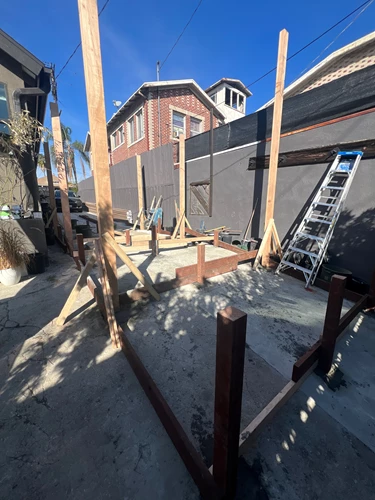
Top Framing Options for Building a Deck Over Concrete
Heavily contingent upon the height of the current slab and the desired height of the finished deck, relative to the finished floor height in your home, you may have several framing or support approaches to choose from. Of course, you’ll want to weigh your expectations of performance, longevity, cost and ease of installation if you’re a DIYer.
Option #1: Fully Supported Sleepers
This method uses pressure-treated lumber, which is laid directly on the concrete slab and therefore fully supported by the slab. Sleepers will need to be periodically secured to the slab using specialty concrete screws to keep the framework in place.
Pros:
- Low framing material cost using 2x4 pressure-treated lumber
- Low profile
- Quick and easy installation
Cons:
- Full contact of lumber with concrete limits water drainage and airflow, reducing the service life of the lumber.
- Settling of the supporting slab will transfer to the framing and decking, causing undulations in the finished deck.
Option #2: Elevated Sleepers
For this method, sleepers are slightly elevated and frequently supported but still depend on the slab for support. The common materials used for elevating the shims are:
- Pressure-treated wood shims or composite shims.
- Specialty metal brackets to elevate the sleepers, as well as keep the framework in place.
Pros
- Better air circulation than full contact method
- Low profile
- Moderate framing material costs using 2x4 pressure-treated lumber
Cons
- More time-consuming installation than full contact method
Option #3: Traditional Structural Deck Frame
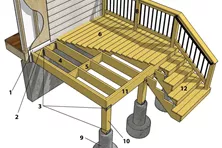
This method involves constructing a typical deck frame over a concrete slab, much like building over soil. The process includes adding footings to the ground beneath the slab. In this setup, the deck frame is independent of the slab itself.
Pros
- Repairing the existing concrete slab is unnecessary.
- Because the support posts and frame are independent of the slab, there’s no concern of the slab settling and causing distortion in the deck.
- The deck can be extended beyond the footprint of the existing slab.
- Best air circulation and framing longevity
- If the finished deck height is under a certain height, typically 24”, (check with your local building code department) a building permit may not be required.
Cons
- Because the slab alone is not designed to support the concentrated load of deck framing posts, footings will need to be dug and poured per local building code frost depths. Depending on the size of the slab and the span ratings of the joists selected, a concrete cutting saw may be required to cut openings in the slab to facilitate intermediate posts.
Should You Use a Substructure or Sleeper System?
When deciding between a substructure and a sleeper system for decking over cement, consider the existing conditions and project goals. A substructure is typically more robust, providing better support and durability for your deck over a concrete pad. This option is ideal if the concrete is uneven, as it allows adjustments and leveling. However, it may require more materials and labor, leading to higher costs.
On the other hand, a sleeper system is a simpler, cost-effective solution for decking over cement, especially when the concrete pad is in good condition. Sleepers, which are thin strips of wood or composite, are laid directly on the concrete, offering a streamlined process. This approach works best for low-clearance areas where height is a concern. However, proper drainage is crucial to prevent moisture damage in this system.
Ultimately, the choice between a substructure and a sleeper system depends on your specific needs. If you seek durability and have the budget, a substructure offers a solid, long-term solution. For projects that need quick installation and lower cost, a sleeper system might be the way to go, provided moisture management is addressed. Consider consulting with a professional to evaluate your concrete pad and determine the best option for your decking project.
Beware of a Sinking Patio
Installing decking over a concrete patio can be a fantastic way to refresh your outdoor space, but it's important to ensure the concrete is fully settled first. If your concrete is still settling, the new decking could shift, causing issues down the road.
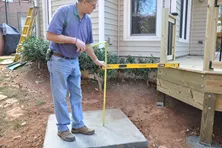
To monitor your patio's stability, try this simple method: draw a fine, horizontal line on your house’s foundation closest to the patio. Then, mark a small X on the patio itself with a permanent marker. Use a level and a helper to measure the distance between these marks. Record the measurement and take new readings every couple of months to check for any sinking.
By keeping an eye on these changes, you'll be well-prepared to install your new decking at the right time, ensuring a smooth and long-lasting installation. With careful planning, you can transform your patio into a beautiful and resilient outdoor area.
Make Sure You’re Not Blocking Any Adjoining Doors
Installing decking over a concrete porch can raise the surface by at least 2-3 inches. If you have a door leading to the patio, ensure the new surface won't block it or create a tripping hazard. To test this, build a 3x5-foot temporary platform at the planned height of the new surface. Place it in front of the door and check if there are any issues walking down to the new surface.
If the new surface might obstruct your door, don't worry! It doesn't mean you can't install composite decking. You'll just need to get creative or consult an experienced professional to develop a safe and effective solution. Embrace the opportunity to enhance your space with decking and enjoy the transformation it brings to your outdoor area.
Connected Stairs Can Complicate a Project
Stairs attached to a porch or patio can add complexity to your project. To keep each step's height equal and consistent, you'll need to adjust the tread height to match the new patio height. A straightforward solution is to place decking on sleepers over concrete steps, ensuring proper airflow and water drainage as per the manufacturer's guidelines.
For the best results, consult a local contractor or decking professional. They can assess your project and guide you toward the safest and most effective solution. Take this opportunity to transform your space with ease, knowing you have expert advice on your side.
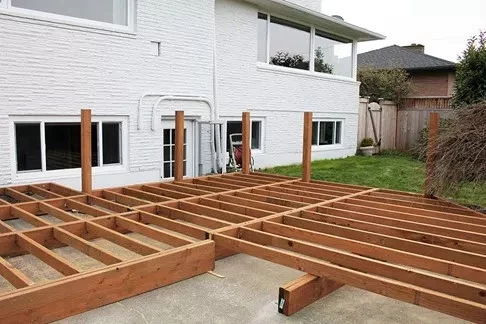
How to Build a Deck Over a Concrete Patio
Time and Cost
The time needed to install composite decking over concrete depends on the project's size. A smaller area might be completed in a weekend, while larger ones could take weeks, depending on your skills and available help. Besides the porch size, time will also depend on the need for shimming sleepers to ensure a level surface, installing the sleepers, and the actual decking installation. Each step requires attention to detail to ensure quality results.
For cost considerations, installing composite decking on concrete typically ranges from $55 to $70 per square foot, influenced by your decking choice, site specifics, and design. Doing the labor yourself can significantly reduce costs, as labor and non-decking materials usually account for about two-thirds of the total cost. By tackling the project yourself, you can save money, but also take pride in your handiwork.
Required Tools | Required Materials |
|
|
* Extra drill bits may be necessary. Expect as many as one bit per 50 holes.
1) Leveling & Layout
If your patio or porch surface is weathered or uneven, you'll need to fix this before laying sleepers. A thin concrete overlay can correct low spots or uneven areas, and you can even add a slight slope to direct water away from your house.
With the space prepared, it's time to plan your layout. Be sure to map out where the sleepers will go and how each surface element will align. For a visual guide, consider using 1-inch wide painters’ tape to outline the sleepers. This step-by-step approach ensures a smooth and successful installation. Enjoy the process and the satisfaction of creating a well-crafted outdoor space!
2) Placing & Installing Sleepers
Sleepers are your go-to for creating a solid foundation, crafted from 1.5-inch wide, ground-contact-rated treated lumber. You might opt for 2x2s, but if their quality doesn't meet your standards, consider ripping 2x4s for the perfect fit.
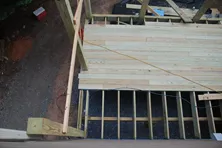
Lay sleepers directly on the concrete pad, or use ½” PVC spacers for added elevation. Whether you want them level or sloped, ensure they form a single flat plane. Start at the highest point of your patio and position your first sleeper, using plastic shims to even out any low spots.
With a hammer drill, pre-drill holes through the spacers, sleepers, and into the concrete. Secure everything with concrete screws that penetrate at least 1” deep. Align additional sleepers using a straight edge for consistency. Finally, apply joist deck tape on the top of each sleeper to keep water out of any screw holes, safeguarding your project from moisture damage.
Embrace the transformation of your space with these straightforward steps, turning effort into a rewarding result.
3) Installing Decking on the Concrete Slab
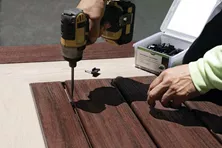
Placing decking boards on sleepers is nearly identical to building them on a regular deck. It’s important to follow the manufacturer’s instructions for installing decking. In general, starting from the outside of the deck and moving inward, screwing accent boards into place first. Starting with accent boards can help guide the addition of field boards.
4) Installing Decking Over Concrete Steps
Once again, it’s important to realize you can’t install composite decking over concrete steps if the top riser height is more than a fraction of an inch in difference from the other risers in the completed stair set.
The first step to building over a concrete stoop is to install a ledger board on both sides of the stoop. You will essentially box frame around the stoop by installing double joists on either side of the stoop and placing a doubleheader beam in front of the stoop in between the double joists.
You can fill in the area above the stoop by installing a 2x6 ledger board with 2x6 joists running out to the header. The 2x6 joists should not contact the concrete stoop. You may need to rip down the joists to provide clearance for frost heaving.
It can be a fairly simple process to install decking on an existing concrete porch. However, it’s also important to remember that your installation goes smoothly, yields a safe structure, and stands the test of time.
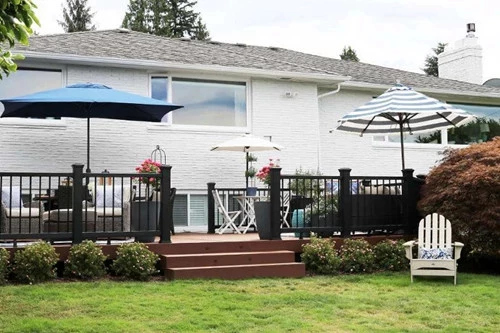
Tips for Installing Decking Over Concrete
A standard deck isn’t as daunting a task as you may think and can take as few as four working days to finish. Before you get started, take a look at these tips for installing decking over a concrete patio:
Attach Posts Properly
Posts should be anchored to the existing concrete to help stabilize the framing. Simpson Strong-Tie makes code-approved post-to-concrete metal connectors. Consult with your local building code official on the best methods for attachment .
Ensure Proper Gapping Between Decking Boards
Proper gapping is necessary for water drainage, expansion and contraction, and allows shrinkage associated with wood joist systems. Consider using hidden fasteners , which create proper gapping when used with grooved-edge boards.
Pre-Drill Holes
Pre-drill surface screw holes to avoid damaging the end of your boards or splitting them.
Understand Local Laws and Building Codes
Before you start construction, it's essential to know that building permits are usually sometimes required when building a deck over concrete. Make sure your deck plan adheres to local building codes and safety standards. In some states, you may need stamped construction drawings from engineers to get a permit.
Planning ahead will make your deck-building process smoother and save you time, money, and effort. To get started, shop for the supplies you need or find a local contractor near you. This preparation will help you achieve a beautiful and safe deck that you can enjoy for years to come.
Learn more about Building a Deck on Concrete
Anatomy of a Deck
A comprehensive guide to help you learn the names and understand the functions of every part of your deck.
6 Best Alternatives to Wooden Decking
While wood decking was previously considered the standard material for building a deck, that’s changed. Homeowners have been exploring and embracing different types of materials, and the availability of alternative decking materials has grown significantly.
How to Build Box Steps for Your Deck
Learn how to build a set of box platforms to act as stairs for a low deck. You don't need to cut stair stringers.
Stair Stringer Layout
Step-by-step instructions for measuring and laying out your deck stair stringers.
Support Long Stringers
Long stair stringers may need extra support from installing a brace at mid-span.
More Helpful Resources
Explore Articles by Topic
Footings
Information related to installing frost footings for decks

Framing
Learn structural framing methods
Decking
Learn about wood and composite decking materials
Stairs
An in-depth look at the complex issue of how to build stairs
Railings
How to install guardrails and handrails to meet IRC code

Features
An overview on water drainage, benches, planters and lights
Design
The basics of deck design
Planning
Learn about permits and working with contractors

Porches & Patios
Build a covered deck to enjoy all seasons
Ledger
Proper attachment techniques
Care
Maintain your deck to maintain your investment

Materials
An overview on water drainage, benches, planters and lights
What to Consider When Building A Wrap-Around Deck
Looking to add a wrap-around deck to your home but unsure of what the process involves? Check out this guide to learn more about top considerations when building a wrap-around deck.
How to Install Composite Decking
Learn about how to install composite decking. Topics include expansion and contraction issues and hidden fastener systems.
How to Build a Floating Deck
A deck does not need to be attached to a house. Building a floating deck allows you the opportunity to create that perfect outdoor space anywhere on your property. Find out if a floating deck is the best option for your new outdoor oasis.
Installing Deck Stair Railings
Ensure your deck stair railing is safe, sturdy, and code compliant with this expert DIY guide. Learn about permits, materials, tools, and the best practices for a flawless installation.
Planning to Land Stairs on a Future Patio
Learn how to determine the location of your stair landing and how to install a concrete slab using forms. Follow these step-by-step DIY instructions.
Cutting Stair Stringers
The stair stringers are essentially the backbone of your staircase. Learn how to properly measure, cut, and build deck stair stringers.
Explore Articles by Topic

Footings
Information related to installing frost footings for decks

Framing
Learn structural framing methods

Decking
Learn about wood and composite decking materials

Stairs
An in-depth look at the complex issue of how to build stairs

Railings
How to install guardrails and handrails to meet IRC code

Features
An overview on water drainage, benches, planters and lights

Design
The basics of deck design

Planning
Learn about permits and working with contractors

Porches & Patios
Build a covered deck to enjoy all seasons

Ledger
Proper attachment techniques

Care
Maintain your deck to maintain your investment

Materials
An overview on water drainage, benches, planters and lights


