


How to Build Deck Steps and Stairs
Building deck stairs can be challenging because potential mistakes exist at different stages, from landing pad and railing issues to misalignments with the stair tread step dimensions, rises, and depths. When making deck stairs, you must also comply with local building codes to ensure the steps are safe. Although the project sounds daunting, our guide will take you through the process step by step as you replace your existing deck stairs or build a set of new ones.
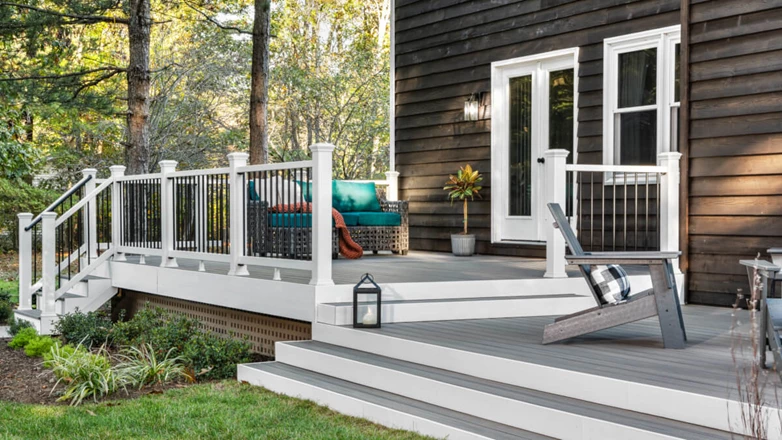
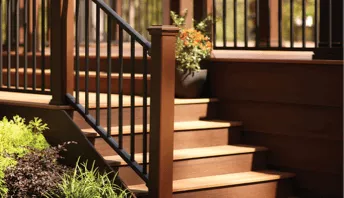
Anatomy of Deck Stairs
![]() Save
Save
Before you start building, you must first learn the parts of deck stairs.
- A landing pad is a flat surface made of concrete, pavers, or gravel at the bottom of the steps. Building codes in most areas specify that there must be a landing.
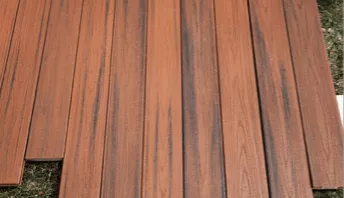
- Stair treads are the horizontal boards that you step on. Stair treads may be made of a single 2x12 but typically have two decking boards — usually 2x6s or 1x6s. The stringers must be spaced properly to support the size of the board selected for the treads.
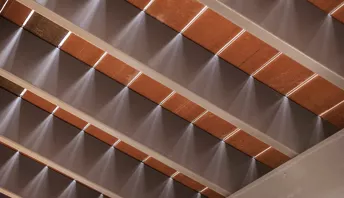
- A stringer is a wide board, often a 2x12, that runs at an angle from the landing pad to the deck framing and supports the treads. An “open” stringer has notches that you can see, while a “closed” stringer is a solid board with cleats for the treads. It might also be an open stringer with a solid board attached to the side.
- Risers are boards installed on the ends to cover the vertical spaces between the treads. Risers are typically made of fascia board or decking material.
- A stair tread is the width (or depth) of a single stair run.
- A stair rise is the vertical distance from the top of one tread to the top of the next tread. The total run is the overall horizontal distance that the stringer travels. The total rise is a stairway’s overall change in height from the landing pad to the top of the decking.
Tools and Materials Needed to Build Deck Stairs
Building deck stairs requires multiple tools and materials. Remember, you must gather all the right tools and invest in high-quality materials if you want your deck stairs to stand the test of time. Here is a complete list of the materials and tools needed to build deck stairs.
Tools Required
- Bar clamps
- Circular saw
- Drill
- Framing square
- Hammer
- Jig saw
- Level
- Measuring tape
- Paintbrush
- Pencil
- Safety glasses
- Scissors
- Shovel
- Sledgehammer
- Speed square
- Stakes
- Upside-down marking paint
- Utility knife
Materials Required
- Decking boards
- Railing
- Fascia boards
- Beam & joist tape
- 3" SDWS Simpson strong tie framing screws
- 5" Simpson strong tie SDWS timber screws
- 8" Simpson strong tie SDWS connector screws
- SDWS 5" fasteners
- Simpson strong tie SD connector screws
- Simpson Stair Stringer connector straps
- Decking screws
- Fascia screws
Planning Your Deck Stairs
![]() Save
Save
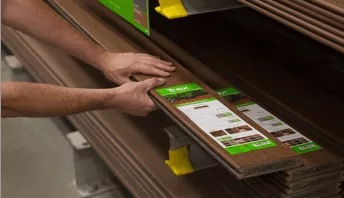
Consider Costs
Calculating the cost of building deck stairs is the first step. Before you get started, create a budget and add up the cost of the materials and tools that you will need. The average price of building deck stairs varies depending on the size and materials used, but it usually ranges from $1,500 to $2,000. An A15-rise stairway can cost at least $1,500 at the bare minimum for the decking, risers, fascia, stringers, screws, and hangers.
Consider the size of the stairs, the type of wood used, and the materials for the railings when calculating costs.
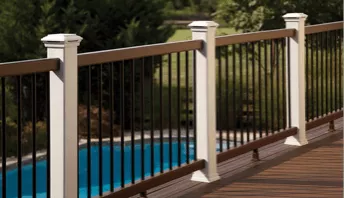
Be Aware of Code Requirements
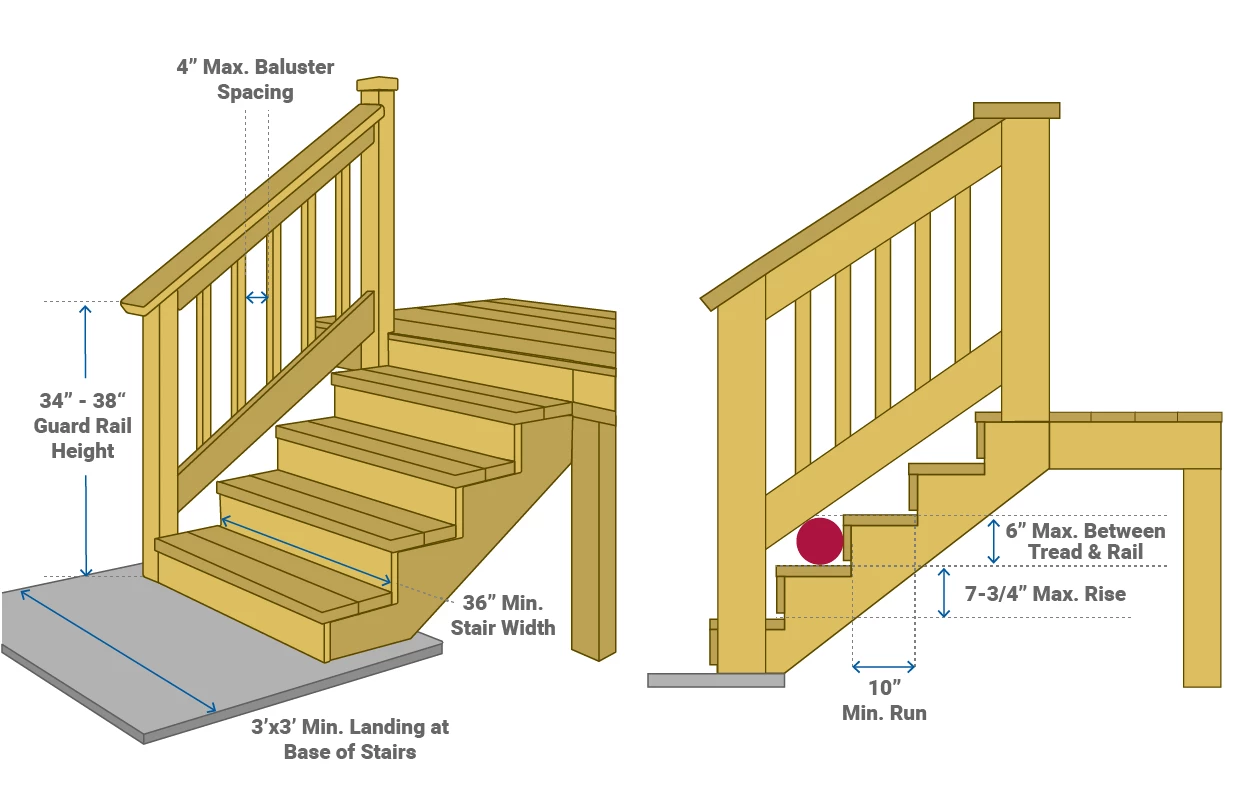
Before starting your project, check the local deck stairs code. For your safety and the safety of others, there are specific code requirements that you must meet when building deck stairs. If your project is not up to code, you may face penalties and, in some cases, may have to remove the stairs.
- The stair treads should be at least 36 inches wide. Despite these minimum requirements, we recommend that stairs should be at least 48 inches wide so that they don’t feel cramped.
- The maximum allowable stair rise is 7 ¾ inches, and the minimum stair rise is 4 inches. The difference between a stair’s longest and shortest riser height or stair depth should be no more than ⅜ inch. This is quite strict, so take the time to plan your stringers carefully.
- Openings in the railing should be no larger than 4 inches between balusters. A 6 inch sphere cannot pass between the bottom rail and the tread. You can test this by trying to pass a 6-inch sphere between the bottom rail and tread. If it fits through, the gap is too large.
- Please include 1-3 sentences of copy emphasizing the need to meet code requirements in a decking stairs project. This should include that it is to ensure individual safety.
- Leverage the existing copy below. If there are additional elements to include, Seer recommends updating this list to improve user understanding.
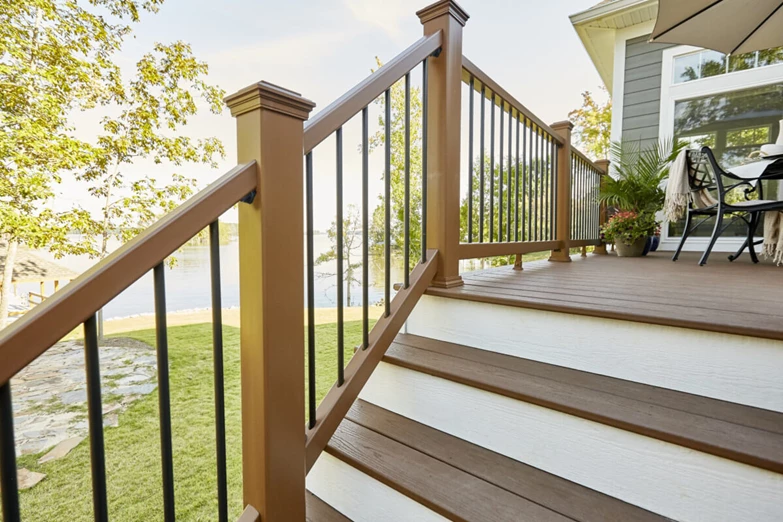
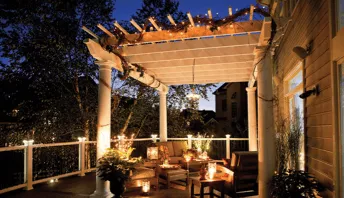
Determine the Location of Stairs and Access Points
![]() Save
Save
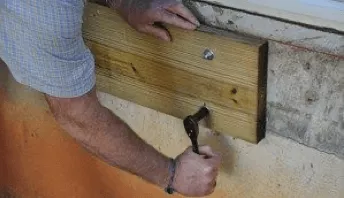
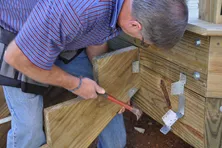
When deciding where to put your deck stairs, you must consider several important factors. Start by thinking about foot traffic on the deck and where people naturally enter and leave the deck. You want to place the stairs where they are easily accessible, but you also don’t want to disrupt the natural flow. Make sure there is an easy exit route in case of emergency, too.
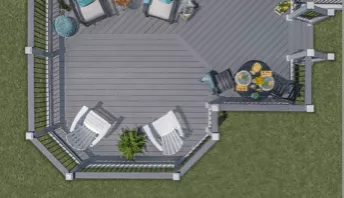
Draw Up a Plan Before You Build
Deck stairs must be precise, so you should always draw a detailed plan before building. Once you have created your plan, double-check all measurements before you start building deck stairs, including ensuring that all stair rises (the vertical height of the steps) and the tread depths (the horizontal length of the step runs) are equal. Significant differences in the height or length of stairs can be a tripping hazard. Remember that failing to plan correctly will only lead to problems during the build.
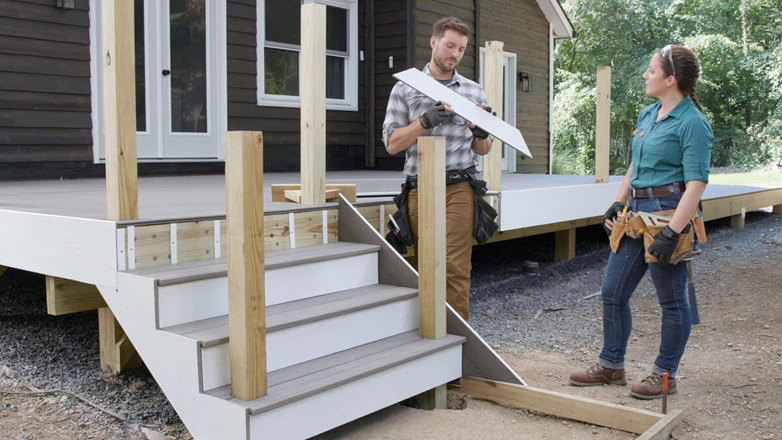
How to Build Deck Steps and Stairs
![]() Save
Save
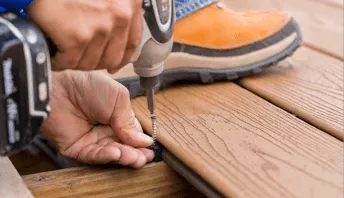
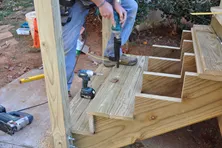
Once preparations are complete, you can begin building your new deck stairs. Start by measuring the total rise to the deck and calculating the number of risers and treads. Then, you can mark things out and cut each piece before fixing your stairs together. Follow the detailed steps below to learn how to build stairs for your deck.
Step 1: Measure the Total Rise to the Deck Landing
First, measure the total rise to the deck landing. The best way to get the total rise is to decide roughly where you want the stairs to end, keeping in mind that the stair angle should be around 40 degrees.
Then, take a straight board and rest it on the deck. Extend this board over the side so that it sits above the proposed landing point for your stairs, and measure straight down to the ground. This gives you the total rise — the total height of your deck stairs.
Step 2: Calculate the Number of Risers
To determine the number of risers you need, take a piece of wood and mark every 7 ¾ inches (7 ¾ is the maximum height allowed by municipal codes). This wood can be used as a story pole to signify the height of each step. Place the story pole upright next to the deck, and count the pole sections between the floor and the deck. This gives you the number of rises you need.
Alternatively, you can take the figure for the total rise calculated in Step 1 and divide it by 7 ¾. Round the figure up or down to the nearest whole number, keeping in mind that it gives you an approximate number of risers, not an exact figure. While 7 ¾ is an average riser height, they can be anywhere from 4 inches to 7 ¾ inches. You may need to recalculate the number of risers with a different riser height to get it to fit nicely. You will calculate the exact height of the risers later on.
Step 3: Calculate the Number of Treads
This step is relatively easy. Take the number of risers and subtract one. You need a tread for each step, apart from the top one because the deck surface forms the tread.
Step 4: Calculate the Exact Distance to the Landing Pad
Once you know the number of treads, you can work out where your landing pad needs to be. Measure the depth of each tread and then multiply it by the number of treads to get the precise distance.
For example, each tread comprises two 5 1⁄2 boards, with a ¼-inch gap between them (the gap allows for contraction and expansion when the temperature changes). This gives a total of 11 1⁄4 inches per tread (the run measurement). The support stringer has a run of 10 ½ inches (11 ¼ inches minus ¾ inches overhang (or nosing) of the tread). So, three steps would extend 31 1⁄2 inches from the deck. This is where the support stringer ends and the landing pad begins. The tread itself will extend past this point, but that is fine because the landing pad supports the stringer, not the treads.
Step 5: Calculate the Exact Riser Height
Start by measuring the total rise and then divide it by the estimated number of risers you worked out in Step 2. This result gives you the exact height of each riser, which should be between 4 and 7 ¾ inches. If the riser height exceeds this range, add or remove a riser from the total and redo the calculations. Remember that recalculating also means you must recalculate the number of treads and the landing pad distance.
You can use our Stairs Calculator to find the measurements and double-check that everything is correct. When you are happy with the measurements, sketch out all the dimensions; you can use the drawing as a guide when you start building your DIY deck stairs.
Step 6: Mark and Cut the Stair Stringers
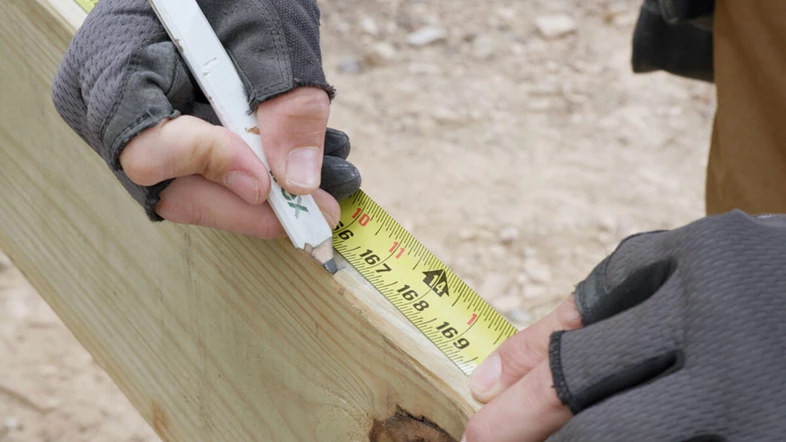
Once you have your run and rise measurements, make a template on a piece of scrap wood. Use your speed square to square the end of a piece of 2x12 to give a 90-degree angle at the end. Then, mark the measurement of one riser on the side and the run measurement along the top.
Join the two points and draw a diagonal line between them. Once you cut along the diagonal with a circular saw, you have a template of the run and rise measurements that you can use to mark the stair stringers.
You should remove the tread thickness from the bottom of the stringer. Upon completing one stringer, you can use it as a template to mark the others.
After double-checking that the stringers are marked correctly, it’s time to cut out the notches. First, cut close to the corner of the mark with a circular saw, and then finish with a handsaw to avoid weakening the stringer.
Step 7: Test-Fit the Stringer
Place the stringer against the deck to check its fit. It should be flush against the deck and fit perfectly between the deck stairs and landing. Once the stringer is in the right place, use a level to check that the treads are level and even.
Step 8: Establish and Prepare a Landing Point
If you are building deck stairs and a landing, you need to prepare this landing point now. First, clamp your stringers to the deck to check the distance, and then start measuring the area for a concrete landing pad. The minimum size for the landing pad is 36 x 36 inches.
Dig wooden forms into the ground and secure them with stakes. Then, clamp a piece of 4x4 to the end of the outside stringer and mark around it with marking paint. This shows where the bottom newel posts need to go. Remove the stringers and dig holes for the posts to create your deck stairs with a landing.
Step 9: Outline the Stair Pattern onto the Fascia Boards
Use the stringer to outline the pattern of the stairs onto the fascia boards, which will run outside the stairs. Mark and cut the top and bottom from the fascia boards and double-check that they fit correctly. Then, attach the stringers to the inside of the fascia boards with approved fascia screws spaced 9 inches apart.
Step 10: Attach the Stringers to the Rim Joist
Start by drawing vertical plumb lines to mark the stringers where the fascia boards will sit, adding a horizontal line between them to mark where the top of the tread will go. Using approved screws, screw a temporary 2x2 into the deck’s rim. The stringers will attach here, and you can then remove the 2x2.
Put three more deck screws through the stringers from the back of the rim to fix them to the deck frame temporarily. Then, fix the middle stringer in place with two deck screws. Put the newel posts into the holes you dug earlier, and screw them to the inside of the stringer.
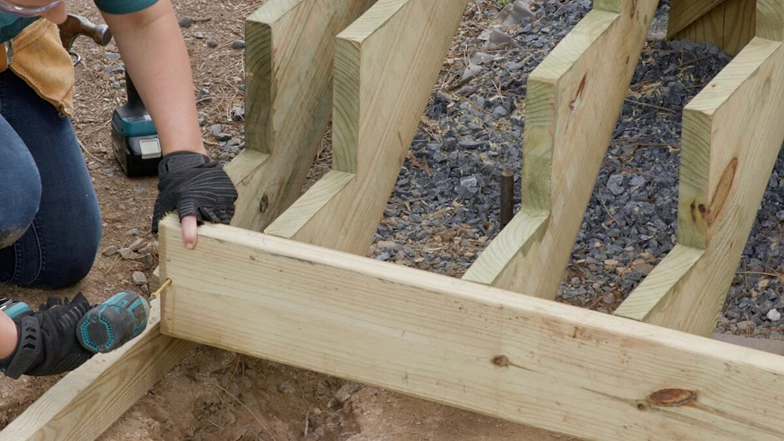
Step 11: Attach 2x6 Supports
Stability is crucial when making deck stairs, so you must attach supports. From the back, screw a piece of 2x6 horizontally along the width of all stringers. Then, take two more pieces of 2x6 and fix them vertically, attaching them to the back of the deck rim and the first piece of 2x6.
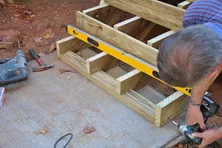
Step 12: Check That Everything Is Square
Start by nailing the bottom riser to the stringer, with two nails in each stringer. Now, you need to check that everything is square and stable. Do this by cross-tapping the basic structure you have built and taking measurements at the top and the bottom. The two cross-measurements must be equal. If not, gently tap the structure to move it side to side slightly and retake measurements until they are identical.
Step 13: Add the Stair Risers and Treads
It is time to attach the remainder of the risers and treads. Screw the risers in first and then screw the tread into the top, leaving a small ¼-inch gap between the boards. Repeat this process until you reach the top of the stairs.
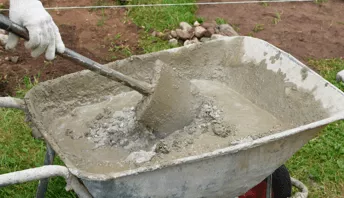
Step 14: Pour Concrete and Attach Stairs to the Landing
Using at least 2,500 psi concrete, pour in the concrete to create your landing pad and level it off with a straight piece of 2x4 lumber. The concrete can then be finished with a magnesium float. A magnesium float is a flat piece of magnesium (sometimes aluminum is used) with a handle. It allows you to float concrete at the desired pressure and angle. Magnesium floats come in a range of lengths and widths, so once you have completed the measurements for your landing pad, you can find a suitable size.
After completing these steps, your DIY deck stairs are ready to use.
For more detailed instructions on building a multi-level deck, please visit Trex Academy.
0:01
[Music]
0:08
Hi and welcome to Trex academy where you can learn everything you need to know about building your deck project I'm
0:14
Devin and I'm here with Lindsay and in this video you'll learn how to layout and build your stairway okay let's get
0:22
started great now as a DIY-er I've always found stairs to be pretty intimidating I'm sure a lot of
0:28
DIY-ers feel the same way you can see that a little bit of mystery to it there really is yeah however I see you've got
0:35
quite a setup uh ready for us here today so where are we starting with this okay
0:41
right so you're referring to the setup would be got my story pull here a few things going on yeah yeah I have
0:46
this straight 2x4 okay it's just going to represent the top of my finished deck okay and I see you've accounted for the
0:53
decking as well right yeah so some of this just helps visualization I feel like that helps take a little bit of the
0:59
mystery of stairs away okay okay so that's going to be the height of our deck I have the story pole here and I have a
1:06
mark at every seven and three-quarter inches okay that's going to be the maximum riser height for our
1:11
jurisdiction all right so that is code I'm assuming absolutely so
1:17
everyone's going to need to check their own municipality to see what their code says you're going to hear that a lot all
1:23
right so ours is seven and three quarters so I said and remember we're looking for both our rise and our run
1:29
but we're going to go ahead and start with our rise okay okay so for the rise and that's how high each stair
1:37
is yeah exactly okay so we could put in one two three a little over four is what
1:44
that's measuring right so obviously we're not going to have a partial step right so we're gonna round down to four
1:49
risers total okay if we round down though wouldn't that make
1:54
each rise over the seven and three-quarter max yeah it would but I know i'm gonna have a concrete pad just
2:01
out here a little bit so that's gonna actually bring some height back so we will be under that seven and three
2:06
quarter maximum okay okay so we have roughly what our rise we have the number
2:11
of risers right we don't have an exact measurement okay but now we can move on to a run all right because we actually
2:16
need to get away from the deck to get the proper measurement of what our rises will be so we can get the exact riser
2:22
height so we need to figure out where our staircase ends yeah okay exactly so to do that we have a mock-up here the
2:29
materials that we're going to be using are Trex enhanced deck boards got two of those five and a half inches each so
2:35
about 11 inches plus our quarter inch gap all right 11 and a quarter and that'll be our run
2:41
okay so we need to talk about how many runs we'll have right we've already determined four risers but our frame
2:46
actually works as one of our risers that makes sense so our actual stringer though it'll be notched out with three
2:53
rises three runs okay okay so eleven and a quarter times those three runs will be
2:59
thirty three and three quarters three and three quarters so that'll be the end of our staircase exactly yeah okay yep
3:04
that'll be the front of our staircase so we'll go ahead and measure out away from our frame okay I'm going to make a line
3:10
thank you and I'm going to have you measure or mark that if you don't mind 33 and
3:17
three-quarter yeah there we go okay just like you said that's the front of that staircase okay
3:23
and now we can bring in really just gonna use this as an aid to measure off of but you can see I'm
3:29
putting this on top of that concrete form that I made right and the reason is this is going to be the height of that
3:34
concrete pad okay so actually if you hold this for one second it is important to have a hard surface at the bottom of
3:41
our staircase okay that is dictated by code they'll also dictate the material that you can use in some cases and the
3:48
dimensions of what that should be so check the code always check the code all right so the materials that you could
3:54
use what could be concrete it could be pavers or brick and some jurisdiction those are all hard
3:59
materials right okay but you just know for sure it's not going to be something like sand or pea gravel something like
4:06
that would definitely not be considered hard all right okay so just keep that in mind right so go ahead and rest that on top
4:11
of there because that'll be the bottom of our stairs and I'll get it over to that line there
4:16
there you go just make sure that's straight up and down yep do that
4:22
there we go so bottom of our staircase to the top of our staircase which will include the top
4:28
of our deck just get you a line right there okay
4:33
okay total riser height all right that's what we've just measured great so we've measured the
4:39
top of our concrete pad or bottom of our stairs exactly and then we've got the
4:44
top of our deck so now that we have this measurement and I will measure that right now we should
4:49
be able to find our exact riser height yes yeah
4:55
right on so we've got exactly 30 inches perfect so
5:01
30 inches and we've got four risers that we need
5:07
so each riser will be seven and a half inches seven and a half inches which is below the seven and three quarter so
5:13
we're in good shape all right so one more thing though I want you to take a second to think about we found the front
5:19
of that staircase yes came out here right really important to measure down from that point instead of just using
5:25
the measurement that we could have pulled from right next to the frame okay so the main reason is there's a couple
5:30
different factors and each deck is going to be different it's pretty flat out here so maybe there won't be that much
5:35
variation whether we're right here or 10 foot out from the house but let's say that you have a decent grade going away
5:41
from the house that could greatly change right it might even change the number of risers yeah that you have in the project
5:47
yeah definitely you could also have a deck that's maybe six foot higher in the air same thing your staircase would now
5:53
come out much further away and you could have a different dimension different number of risers so that's why it's
5:59
really important to check that okay okay so we have our rise seven and a quarter seven and a half yeah so now we're going
6:06
to talk about our run and how to get a run exactly okay so we know that this is 11 and a quarter inches right
6:13
but I'm assuming since we have to do another calculation we're not going to include this overhang here right yeah
6:20
because this is going to be our stringer this is going to be what the material sits on top of okay so we want
6:25
this bit yeah we want that inside measurement perfect all right 11. so we'll take 11 and a quarter minus
6:31
the overhang minus the location yeah so that should be
6:37
like 10 inches exactly 10 inches and since we have this mock-up we can use that to double check our work
6:44
okay there you go exactly 10 inches so that'll be our run all right so we have our run at 10 inches our rise at seven
6:50
and a half inches so I think we're ready to cut our stringer out yeah all right
6:57
let's do it okay sounds good so now we're ready to start notching these stringers okay first I want to
7:02
show you a couple different options that we have pretty common to see this one on a work site okay so this is a framing
7:08
square a couple clamps on it and really one of the great things about this as a professional let's say I'm working on a
7:15
really big job and I have multiple staircases sure which could mean that my rise and run might change depending on
7:21
you know how they're set up so in that case I can very easily just change one of the positions of my clamps because
7:27
one of these is going to be my run and the other just going to be set at that rise got it all right nice really useful
7:33
tool okay but let's say that you're a DIYer and maybe you've already picked up quite a few tools you don't want to buy
7:39
any more tools so instead what we can do actually make a template that can do the
7:44
same thing oh yeah look at that that's cool yeah pretty neat right so you can see our rise and our run so we really
7:51
just do the same thing we're going to be measuring for the rise measuring for the run the only difference is between that
7:57
framing square is this is going to be like a one-time use kind of thing right you might not be using that same rise
8:03
and run on another staircase but it's just scrap pieces of wood exactly right yeah you'll have them around regardless okay so we're going to
8:10
start by cutting one from a two by twelve okay two by twelve will always be the material that you use for stair
8:16
stringers all right so important to note that good to know all right so let's go ahead and get started okay I'm gonna square this up first because we know it
8:23
doesn't come square from the mill exactly okay very nice
8:30
okay so from here we just need to measure and mark the rise in our run okay our run was 10 and rise was seven
8:36
and a half exactly cool go whichever way you want all right we'll mark our run right here okay
8:45
and our rise at seven and a half right there level we'll use a straight
8:51
edge to connect those okay and you'll see once we connect that we're going to have that same triangle we have on our
8:56
tool or our pattern can you just hold that edge right there make sure it doesn't slip around on me
9:04
and we should be good all right very nice looks good okay so from here we'll just cut it out and we'll attach it to a
9:09
2x4 to act again as that basically hold it flush so we don't have to try to hold it flush and mark at the same time go
9:16
ahead and move these out of the way okay now we're ready to start marking out or
9:22
transferring the rise and run to our stringer sounds good to me okay and actually
9:27
grab this so go ahead and put that in position okay again nice that we have this right to keep
9:33
everything flush yeah very nice okay so now you can see our first rise
9:38
and we'll bring in this level right here and that's actually going to be the bottom of this stairway okay okay so you
9:44
can see we could work either way this is just a good visual representation of where we're starting this will be the
9:50
part that goes on that concrete pad and we'll start to go up okay go ahead and mark those
9:56
and it's really important to remember we need to be tight all the way to the corner yeah you'll see why now we're going to
10:02
shift this down matching up this corner there you go yep that's why it's important to come all
10:08
the way out to that yeah the edge we're just continuing the process until
10:14
obviously you have the number of rises and runs that you need for your stairway
10:19
all right so this will be okay so we've got one two three rises
10:25
and this will be our third run right here that'll be it
10:31
okay so from here we can bring our straight edge back in all right just like that hold that in place make a mark
10:38
right here and then that's going to be the part that attaches to the header of our frame
10:44
all right there we are here we go one stringer down all right so now we need to cut it out and we'll be making six
10:50
more so seven total stringers okay we need to be nine inch apart nine inch on center right we kind of talked about
10:56
that before with that box step right because we're using Trex enhanced deck boards got it okay all right let's get
11:02
to cutting sounds good I'm gonna leave this one up to you all right I think i can handle it
11:10
okay stringer looks great thanks obviously we have one more cut left to make yep but we have to make a little
11:16
adjustment so let's go ahead and stand this up as if it were an installed staircase got it so I'm going to show
11:21
you with a mock-up exactly why we need to make an adjustment right here okay because our rise is going to be the same throughout doesn't matter if we have
11:27
three like in this case or if we have six right just take care of six steps so
11:33
I'm gonna bring in this mock up of our deck boards and our fascia and now you can see from the top of the
11:38
deck board top of the next board same height right that's going to be the same height as here top of the deck board to
11:45
that deck board right now the issue is when you come down here you can see we don't have a deck board
11:50
on the ground right or on our concrete pad that we'll be setting this on so easy remedy we just bring this up by
11:57
an inch and now we know that every step from the concrete pad top of the deck board deck board at the top of the next
12:03
will be the same throughout makes sense seems easy enough it really is so let's set it down
12:10
it's as easy as measuring an inch away we'll make two marks and then we'll just transfer that line across
12:23
and then typically once I have those lines made I just like to make a visual indicator so I know where to cut
12:28
obviously since we're not using this as well same thing so however you like to do it but from here we'll just cut that
12:34
and we'll have our first stringer okay now we do want to treat these cut edges right yeah so we've always been treating
12:40
cut edges all along the way but this has to be the most important part to make sure you treat all the way around so not
12:47
only do we have cuts on multiple angles but we've also cut really far into that two by twelve and the treatment the
12:54
original treatment hasn't gone that far okay yeah really important to treat because we do not want our stairs to
12:59
fail makes sense all right I'm gonna go ahead and cut this one and that to you
13:11
there we go first stringer done all right [Music]
13:22
before we move on any further in the stair process we wanted to show you really quickly how we attach our header
13:28
right here so the main purpose of installing the header is going to be for the lateral forces that are going to be enacted on
13:34
the stairway right so we have two forces that vertical force and also the lateral force which I just mentioned just
13:41
imagine that you have a stairway belt and there is no header here with our stair landing about right in there yeah
13:47
holster we're just gonna follow exactly okay so that's what the header gives us so the assembly of this
13:54
is just our four by four post which we have two of and then just to show you what this looks like
14:00
it's gonna go just something like that behind our rim joist and then we're using the blocking that we have for our
14:06
post here so we have a perfect hole a uh three and a half inch hole obviously because our post here and then we have
14:13
that post blocking behind that so the way we attach this all together is using an eight inch timber screw
14:19
through the front rim joist through the post and into that blocking yep just makes it super sturdy yes absolutely
14:26
which is important for stairs right yes definitely okay so back to the header a little bit a couple things you need to
14:31
point out first of all the length of that header is going to be cut to the width of our stairway yep okay a couple
14:38
of reasons that's important number one it's really going to help us when we go to set up our newel post or these bottom
14:43
rail posts and also it's going to help us with installation of the stringers because we know it's
14:49
the right size so we'll have a stringer on each end and then we can divide up where the rest of those stringers go
14:54
another thing to point out you can see we actually have a bevel on what's going to be the bottom of that header and
14:59
that's just going to support our straps as we install those on the back they'll be able to wrap around and
15:05
really nicely fit onto those stringers yeah and this bevel is about 35 degrees
15:10
or so you'd say right exactly yeah you can be somewhere between 32 to 38 degrees doesn't have to be super
15:16
accurate but it is nice to have whenever you're installing those straps yep okay so let's go ahead and put this in place
15:23
all right put that right against those four by four blocks
15:28
all right okay and then now we're using five inch timber screws going through the header and into that
15:35
blocking
15:43
okay very nice now we're ready to start working on finding the position of those bottom know posts or bottom stale rail
15:50
pose yep okay so this is going to be the first step in the actual assembly of our staircase okay
15:56
so to get this process started we have to think through the process a little bit we have our stair stringers cut and
16:01
we talked about this a little bit before but we're gonna have one stringer on each end of our header here okay okay so
16:08
from here let's go ahead and measure down the height of one of our risers okay
16:14
and that's seven and a half inches right yep seven and a half inches and are we measuring yeah okay I see
16:20
you're measuring from the frame and not the deck yeah exactly right because we don't have finished material or deck
16:25
boards on any of our stringers so we want to be at the top of where that stair is going to be all right okay so
16:30
with those marks made let's go ahead and bring in our first two stringers sounds good and we'll just clamp those in place
16:38
to hold them temporarily also obviously we're lining the top of that stringer up with the marks that we
16:44
just made okay and it should come it should be flush with the edge of the frame right
16:49
absolutely or the edge of the header board okay there we go
16:58
I need a third hand yeah it would help right right okay actually you know what I have a
17:04
third hand let's use this here we go there we go
17:11
there we go very nice slide that back out all right so a couple things obviously we get to see a visual
17:17
representation now of what that stairway is going to look like just how wide it's going to be kind of how it fits together
17:23
with the rest of the deck but also at this point we can now find the location of those bottom posts so let's just go
17:30
ahead and set these four by fours in right here we want this to be flush with the end of that stringer and we also have to think
17:37
about the rim board that's going to go right in front of this so when this is actually installed it'll go flush with
17:43
our stringer and then up against that rim board just like that let's go ahead and clamp that in place
17:48
there we go and now once this is clamped in again we can work hands-free which is
17:54
always nice especially if you're working alone right yeah definitely so we're almost ready to mark the
18:00
locations for these posts the last thing we need to do is just make sure that this stringer is square with their deck
18:05
frame just pull out a square we'll check that
18:10
all right good right there just need to come over a tiny bit okay
18:16
and I am good good to go yep all right so from here we're just using this 4x4
18:22
as a template and we'll just paint all the way around it tracing it to give us a pattern of exactly where that post is
18:28
going to go great then we'll just remove this assembly and then paint an eight inch diameter circle around that and
18:34
that'll give us the area that we need to dig out for that post hole sounds good all right go ahead and make this mark
18:43
[Music]
18:52
well we just finished digging our post holes what's next all right so from here we're going to be attaching a support
18:58
block to the front of our rim joist and that's just going to help us while we install our stringers it's going to give
19:03
us a couple things all right first of all it's going to work as a helping hand so we can attach them temporarily and
19:09
not have to be trying to hold it while at attaching it okay okay the other thing though that's going to give us is
19:14
the bottom of this is going to act as a basically a stopper arm yeah like we've
19:21
used a few times exactly yeah we're doing our deck boards right so as we bring these up we know exactly where
19:26
they're going to stop yeah they're going to be perfectly in line all the way across great okay so to lay out the
19:31
support block what we did first is we cut this board to length it's going to be the same width as our header which
19:37
again is the same width as that stairway as well okay all right so this is just two by material
19:43
rip that down so it's right around an inch and a half by inch and a half okay something like that should be just fine
19:49
okay so as far as laying out all of our stringers we know we're going to have a stringer on both outside ends yes
19:56
stringer down there stringer right here we also know that our post locations for these null posts
20:01
at the bottom these are going to be right in line okay same thing over there yeah so you can see we have a stringer a
20:07
space for our post and then we'll have another stringer on the outside of that post to help support that assembly makes
20:13
sense okay same thing over there yep stringer post stringer yep and then we
20:18
have a space in between both of those which obviously we're going to have to have stringers to support our stairs
20:24
there as well so in our case we just needed to find that space which was 36 inches and
20:29
divide that up to make sure that none of our stringer spans are more than nine inches on center okay now the nine
20:36
inches on center is that dictated by code right so that's actually part of the evaluation report on these deck boards
20:43
for example the Trex enhancer we're using is nine inches on center but if you were to go with transcends that
20:49
would be 12 inches on center okay okay so we need to check that out all right so in our case when we divided
20:56
that up we ended up with four base total and then three stringers in the middle of that span so just to recap we'll have
21:04
two stringers on that side on both sides of the post same thing here and then in the middle we'll have those three
21:10
stringers cool give me a nice sturdy connection for those stairs sounds good so now we're ready to come down here and
21:15
actually install this let's go ahead and put our ears in all right we did make a mark at seven and a half inches down
21:21
from the top of that frame and that's going to be the bottom of our support block here okay but to make the
21:27
installation a little bit easier we're just going to go ahead and mark the top of that obviously it'll be a little easier for us to see yeah so we'll just
21:34
subtract the thickness of our support block okay it'll be an inch and a half okay so six inches is where we'll be right at
21:41
six inches and also measuring from the frame yeah still staying down from the top of the frame perfect
21:48
one here since we also have a fastener in the middle I'm gonna make a mark here
21:53
there we go okay so now we can bring that support block in all right
22:00
again let's just make sure that we have that flush with our header here yeah I'm good here I am
22:08
also good right here yep great here we go you want to get that in
22:18
there we go okay so now you can see that as we bring in all these stringers
22:23
this is going to act as a stop just like that as we install all of those those are
22:28
going to be straight in line gotcha so let's go ahead and attach our first outside stringers okay again making sure
22:34
that we're flush with the header yeah using these fasteners that we preset
22:41
into the top of that support block really makes the whole process really easy cool you go ahead [Applause]
22:48
all right very nice all right look at that again hands-free really easy to work again if you're
22:54
alone I think this is a great thing to do cool okay so now we're ready to bring in that concrete form okay we're gonna
23:00
bring that in get it in the correct position and then we'll start to level it sounds good okay let's go ahead and
23:05
get our concrete form in place right and you can see that we have already dug a spot for it
23:11
but there are still a few things that we have to do before we're ready to pour concrete okay so one is going to be that we need to make sure that we have our
23:18
form parallel with the front of our deck make sense we're also going to make sure that we level it and that we square it
23:24
all up okay so again we're going to be pouring in concrete so we want this to be as straight and square and again
23:29
parallel to our deck as possible okay so the first step like I said is going to be to make sure that it's parallel okay
23:35
this is gonna be really easy because we already have both of our stringers in place so we know that our stringers are gonna
23:42
be resting by about a quarter inch on this heel on the form okay and the rest of that stringer is gonna be resting on
23:48
our concrete pad okay that being said we just need to move that into position where you can see that just a quarter
23:54
inch of our heel is going to be on that form all right yep I think that's good over here there yep okay here we go it
24:01
really is that easy so now we know that the back of our form is parallel great okay so let's move on from here and
24:07
we're going to start on this outside corner okay a couple things we're gonna have to do here one is gonna be we need to square up
24:13
this stringer okay and the reason we're gonna be doing that is if you don't mind just grab that spacer that we have yep
24:21
so this is a spacer made of the Trex material that we're using our fascia plus the spacer because that's going to
24:27
be yeah that's going to be the outside finished of our stringers okay so just clamp that
24:34
in place and hand that to you to hold on to while I grab this clamp okay
24:40
okay there we go and so we're using this as a tool to get
24:46
this corner right here parallel with the side of our deck so here's what we're looking for because
24:51
of the way that we designed this concrete pattern or stairway the way that we want our Trex fascia to
24:56
lie is going to be flush with the edge of that concrete pad so in our case that means all we need to do is then shift
25:03
that concrete form to where it goes right up against that fascia okay and then we know we're in the right spot
25:09
sounds easy so I'm gonna have you do that while I hold this stringer square okay
25:14
okay so I'm gonna hold that right there right in your square right now yep so now you'll just push that
25:20
but the whole time we need to keep in mind that we need to stay parallel all right so we want to keep that quarter of an inch right exactly I'm good back here
25:27
sorry that's all right there we go all right I think we're good here good yep okay so now we're going to bring that
25:33
corner up okay we've talked before our stairway total is going to be 30 inches from the bottom to the top so let's go
25:40
ahead and grab this two by four we're just going to go ahead and set that on top of the deck and then if you
25:46
remember the bottom of this 2x4 it's going to represent the top of our deck
25:52
yeah there we go so you can see that just extends the top of that deck out here further which makes this really
25:58
easy to work with our form yeah so again we know the bottom of our stairway
26:03
is going to be 30 inches from the top so that means the top of our concrete pad is going to be 30 inches as well makes
26:09
sense what we'll do is I'm just going to measure down from the top of this 2x4 and then what I'll have you do is just
26:16
pull that form up okay until we're right at 30 inches to the bottom of this 2x4
26:21
and I have this little shim to kind of help here great to just hold it in place yep about another half inch
26:28
and let me get that quarter inch straight again yep all right okay a little bit more okay
26:35
got that there we go very nice okay but again the whole way we need to check on everything that we've got in
26:41
line so far so you said you already lined it up with the quarter inch quarter inch is good I'm just going to check square okay looking good there
26:48
still lined up with that piece of fascia that we have here all right perfect okay so we have our first corner
26:54
so from here we're just going to repeat that process on the other corner and then we'll be able to stick everything in place sounds good
27:01
so we have both of our corners set to the right height and now we're going to add in some stakes to hold that position
27:07
temporarily so the stakes that I'm going to be using are metal stakes these are great because they are readily available and these
27:14
ones in particular come with pre-drilled holes which is great it's one less thing I have to do now of course you could
27:20
also use wooden stakes those are just fine but for the area that I'm in the soil is really rough and full of rocks
27:26
so these are great so I'm going to go ahead and stick these both in and then I'm going to continue leveling the front
27:31
of this and then I'll square my form after that I'm just going to bring up that 2x4 again do the same process where
27:38
we measure down to 30 inches to make sure the front of the form is at the correct height
27:43
so while I'm doing this I just want to make sure that I have a foot or something against here so that your form doesn't move over while you're driving
27:50
in these stakes
28:00
okay it feels really good there I'll just do one more here on the back side
28:15
there we go I'm just gonna attach that with those holes already in there
28:20
there we go I don't need to go all the way through something like that should be just fine
28:27
do the same thing over here
28:33
all right there we go so now I know that the back of my form is going to stay right where it needs to be
28:39
I'm an eighth off there we go boom
28:48
all right so now we know that our form is parallel to the deck frame it's level and we've
28:53
squared it up yep so now we're ready to start installing our stringers okay all
28:59
right so before we do this I think it's important to point out that this would be the perfect time to mark out the
29:05
pattern for your fascia that you're going to be using okay obviously that depends on the design that you're going
29:10
with but in our case we're going to have fascia on both sides of our stairway so the way that we'll be doing our
29:16
design we know that that fascia is going to be flush with the top of our deck boards and also flush with our fascia
29:22
here on the risers so what we need to do in this case is we'd have a little mock-up or you could just simply trace
29:28
this out and measure the distances or thicknesses of what you have but since we already have this mock-up we just
29:34
laid this pattern on top of that Trex fascia put this on top we would trace this top
29:40
trace the riser and then continue working our way down yep very simple process
29:45
all right now what happens if the stringers were already installed and then we remembered we need to trace out
29:53
or cut our fascia what's uh are there not is there another option sure with most things in the deck there's always
29:59
different options you can do I think this is the easiest just pre-planning right take care of it now but there is
30:05
another way and I'll show you how to do that after we get both our treads in and our risers sounds good okay
30:11
with the support block this becomes incredibly easy
30:16
yeah you don't even need me to hold those for you well it also helps that we have our form at the bottom working as a temporary support as well
30:24
so that is an important thing to remember these will be coming back out once we permanently install all of our
30:30
stringers and there we go just make sure it's tied up
30:37
against the back there we go super nice too when this block comes out after the stringers are
30:43
attached everything will be right where we want them yep all the heights of the stairs will be in the exact same
30:49
location yep there we go last one set that for you
30:57
there it is cool here we go you know upstairs yeah yep coming together
31:03
all right so from here we're going to be installing our front rim board of the stairway let's go grab that all right now we're ready to put this rim board in
31:10
couple notes about this and how to find the dimensions of urim board in particular so the width of this rim
31:15
board is going to be determined by obviously the width of our outside stringers which again is going to match
31:20
that support block and in this case also matches our header so that's how we got our width but also we have to think
31:27
about getting that height right obviously this is just two by material and we rip that down to six and a half
31:33
inches because in our case that's going to be the height of our bottom stringer so obviously in your case you're just
31:38
going to have to rip it to whatever dimension you have on the height of that stringer so let's go ahead and tack this in place okay we've got our three inch
31:45
fasteners on each side that's just going to help us hold it in place while we can work on it put some larger fasteners in sounds good and this
31:52
should be flush right yeah top and the side here
32:00
okay so couple reasons why this is great uh number one it's gonna tie everything
32:05
together you can see once we attach all of these stringers to that rim board this is gonna be one solid construction
32:11
yep okay the other thing it does though if you plan accordingly we have the layout for all of our stringers on this
32:17
front rim board as well so we did that just by matching the pattern up here and now we know that all the spaces in
32:23
between those stringers are going to be equal at the bottom okay so I'll go ahead and get this part in over here all right again making sure
32:30
that I'm flush with the top the side and the bottom
32:36
and there we go great so with that in we can put some larger fasteners on both
32:42
the ends and the second stringer in on both sides okay the reason we're going to be doing that is we're going to have
32:47
a post on both sides in this position right here but because we're using a pretty large
32:53
fastener this is a 5 inch sdws timber screw we need to make sure that we pre-drill whenever we're connecting
32:58
those stringers first of all this is pretty thin material to have such a large passenger go into so that's why pre-drilling is
33:05
really going to help but also because we're so close to the end it's really important to pre-drill yeah okay so
33:11
let's go ahead and get started on that and then we'll put these outside fasteners in great and I have my marks made two inches from the top and one
33:18
inch from the bottom perfect all right so we have those five inch timber screws in now we have to make a
33:24
choice okay we could either continue attaching our rim board to the bottom of those stringers or we can start
33:30
installing our bottom post here what do you want to do it makes a little more sense to me to start on the posts yeah
33:36
yeah I think so too um neither way is right or wrong but in that case with these stringers still loose we'll be
33:42
able to move those out of the way to get our fasteners into the side of that post okay yeah definitely start on the post
33:47
yeah that'll be perfect all right all right if you don't mind just come over here and we'll start working on this first post together no problem grab this
33:54
okay drop that in place and then I've got my post level here
34:00
and these are great because they have two levels because obviously we need to plumb it both this way and this
34:05
direction go ahead and slide that over there we go actually we're pretty close
34:11
I'm going to work down here well that's good it's a good place to start right yeah all right so I'm tight against the
34:16
bottom here need to be tight in this corner first and now we can start by working this direction got it so this is
34:25
exactly where we want to be yeah do we need it to be just a tiny bit there we go okay
34:31
yep we're good right good yep perfect let's go ahead and tack that in place so we know that that's not going to move
34:37
out of plum okay good so I can see that I have a bit of a
34:44
gap it's no problem I'm just going to bring in a shim and that way whenever we go to fasten
34:50
the front of our rim board to this it's not going to pull us out of plumb
34:55
okay so now let's look at it this direction
35:01
there all right we are right where we want to be okay
35:07
so same thing just tacked in one more fastener and now that'll hold plumb while we actually fasten it permanently
35:14
okay so to do that we're gonna be using the same five inch timber screws we'll have two go through the front rim board
35:21
into the uh into our post same thing on the side two more fasteners again going into the post and finally we'll have one
35:28
fastener going in through the second stringer into the post tying everything together
35:33
okay so obviously you'll be able to tell with all of that it's gonna be a really sturdy post yeah okay so same rules
35:40
apply we're gonna be two inches down from the top one inch up from the bottom but we do need to keep in mind that as
35:46
we put in these side fasteners we don't want to intersect with those so we'll move that around about a
35:52
quarter of an inch just to make sure they don't hit each other okay okay I'll go ahead and make these two
35:57
inch marks I'll help you out on this side okay now while I'm doing this quick question um
36:03
why didn't we put cement in these holes first like we did with our footings right so why didn't we pour a footing
36:09
first and then just drop it on top exactly well because this isn't actually supporting our stairway okay the
36:15
stairway is going to be supported by resting on top of that concrete pad so that's where the structure comes from okay what we're going to be doing
36:22
instead is we've dropped our post we'll be pouring concrete all the way around that post which will support that but
36:28
we're going to continue pouring so this will be one piece one pad altogether okay so that that pad won't be able to
36:35
move around all right okay yeah it makes sense all right very good
36:40
I think we're ready to go ahead and start pre-drilling great I'm gonna have you start on that side
36:45
and then I'll do these two up here
36:54
[Music]
37:10
all right our posts are secure and plumbed so I guess the next thing that
37:16
we need to do is secure the rest of our stringers to the rim board right exactly yeah we're ready to move on great now
37:22
are we still using those five inch timber screws no so for these middle three stringers we're going to be
37:28
switching to these three inch sdws framing screws okay same way that we did those five inch fasteners we'll have two
37:35
going through the rim board into every stringer okay two inches down from the top one inch up from the bottom sounds
37:41
good so the first thing we'll have to do then is knock these back into position again we do have our layout so let's just
37:48
knock those into position and then we'll use our speed square to make sure that they're straight up and down good good
37:54
reminder okay [Music]
38:00
[Applause] [Music]
38:06
okay so now we're under the stairway and we need to go back to talk about the two forces that are going to be enacted on
38:12
the stairway so one of those are going to be the lateral forces which we've dealt with with the installation of our
38:18
header but we still need to deal with those vertical forces so to take care of that we're going to be installing these
38:25
msta 15z strap ties so these are going to be installed just
38:30
like this here at the top they'll connect our header to those stringers but we also have
38:36
other options as we do with most things with deck building you could also use an l70 which would go in the corner here
38:42
again making that attachment from stringer to header and there's also a special bracket that would attach to the
38:48
header first and then you would set your stringer down inside that and attach that all together this is just the
38:53
method I prefer but every one of these options would be fine so to install this strap first thing I'll do is line that
39:00
up with the top of our header here and now I have a place to bend that I'm just going to go ahead and give that
39:06
a bend and now you can also see the importance of that bevel that we created so now
39:11
that strap is going to lay flush with our stringer looks really good right there so from here I'm just going to hold that in
39:17
place and I'll get a fastener in here at the bottom and then at the top and then I just need to fill in all of these
39:23
holes with these inch and a half sd connector fasteners okay looks good right there
39:34
okay there you go so with that in place now I can just double check make sure that goes straight in line with my stringer and now I can start to fasten
39:40
the rest of these I'll be doing the same process every time that I have a stringer to connect that header and
39:46
stringer and again deal with that vertical force hey hey look at that support block is
39:53
coming off big moment yeah so we have all the straps installed our stringers are fully
39:59
attached to our rim board and both of our posts are fully supported this entire assembly is fully
40:05
structurally supported yes and we treated the cuts that we made for our stringers which is a super important
40:11
step because we cut pretty deep on those so I definitely want to make sure we didn't skip that yep and I brought us
40:18
some tracks protect to also put over the tops of these stringers just gonna help extend the
40:24
life of those a little bit yeah again I really do think it's important to take some extra time to protect the stringers
40:30
um you obviously know a lot of people are gonna be coming in and out a lot of weight right a lot of things happening
40:35
here so it is good to protect this investment spend a lot of time building this and we've got fasteners drilling
40:41
down into the top so that's gonna wrap right around them and keep that water seal on the fastener right exactly
40:48
okay let's do it okay so all of our Trex protect tape is installed now we're ready to move on to
40:54
installing our treads and our risers yeah almost finished really is a pretty big step right
41:00
that was pretty bad I see what you did there okay so let's start by talking about the two ways we could install this
41:05
we could start with our risers first and then just bring in our treads just like that okay or we could do it the way
41:12
we're gonna be doing it where we bring in the treads first and then install the risers on top just
41:18
like that now depending on what you do is really just based on your design right yeah it's just preference either
41:24
one works fine but we've already designed it out this way and the reason we did that is that as we bring in these square edge
41:31
boards this is going to give us a really nice reveal okay and it's also going to give us a
41:37
three-quarter inch overhang past this fascia gotcha okay okay yeah I like it that square edge
41:43
does look really nice yeah it looks really good so because we're using square edge
41:48
boards though we can't use those hidden fasteners in between because there's no groove for it to set in makes sense so
41:53
what we're going to do instead is go back to those color match fasteners that we've used before
41:59
these are going to be surface mount so let's go ahead and get the first tread in place okay I'm going to do that
42:05
by making sure that I'm flush with the edge of the stringers good I'm good over here all right
42:10
okay so you can also see that when we remove that support block we're able to install the rest of our spacers when we
42:17
bring in that fascia got it okay so now we're ready to attach this as we're attaching this couple things we need to
42:22
think about okay we need to stay an inch from the end and an inch in from the edge every
42:28
time we put a fastener in we're also going to be fastening to the tops of all of our stringers so every
42:34
time that you see this deck board on the stringer we're going to put two fasteners in there okay so I'm going to
42:39
get started on this side but because we're so close to the edge and the ends I really think it's always a best
42:45
practice to pre-drill first okay okay so I'm gonna start on this side you start on that side and then we can just meet
42:51
in the middle sounds good to me
43:01
[Music] all right so we have the treads on our stairs we've put the fascia on our
43:06
risers and we have one piece of fascia over here on that side of the steps yeah it's almost done yeah it is very
43:13
exciting so for that piece of fascia I used one of the stringers as a template to trace
43:18
that out yeah which was super easy but you said that there was another way we could do
43:24
it after the fact absolutely we still have one that we need to do where do we start that's part of the puzzle right
43:30
yeah okay so if you didn't pre-plan or maybe you just prefer to do it a different way there is a way to do this
43:36
with all of our stringers already installed so to do this we're going to go back to this little template that we made it's a
43:42
little pattern that gives us a rise in our run yep okay but if you did use a framing square with those clamps that'll
43:48
work just as well just go ahead and set that same rise and run of what your stairway is so what we'll do is we have
43:54
a piece of Trex fascia here that's what we're going to be using is the material for the side of those stairs
43:59
let's just bring that template in and this is going to give us our plumb cut okay that'll be the cut that we have
44:05
right here that'll go tight against that rim joist I'll just mark this out and then I want to make sure I extend
44:10
that line all the way down okay what we'll do from here is we'll just match the number of steps that we have
44:17
so that we can find the bottom of that stairway and that's going to give us our flush cut it's just like that so you can see
44:25
this rise right here that's going to be our bottom step okay but that's not important yet first we're going to need to get that
44:31
flush cut which will be the bottom and then again make sure you extend that line all the way across okay okay
44:38
so if you do that cut both of those lines out you should get something that looks just like this
44:45
now you can see we have our plumb cut up top so that's that straight up and down and our flush cut at the bottom
44:51
okay so I'm just going to get this tight against our rim joist just like that and now we're almost ready to go ahead
44:58
and trace that out yeah that seemed easy enough pretty easy right really so what are you what should we do about this
45:04
section here so this fascia is not wide enough to cover the full stick over the entire stairway right so again easy fix
45:13
for that we're just going to rip down part of that material again this is just trex fascia the width of whatever your
45:18
stairway could be you know could be wider so we'll just put that in tight against that other fascia so it'll just look
45:24
like one wider piece of fascia sounds good all right okay I'm going to hold this in place and
45:30
if you don't mind just start tracing around all of our risers and all of our treads okay I think i can handle that
45:45
all right our stairway is completed we started with that design and planning phase and we moved on to cutting out all
45:52
those stringers attached everything together structurally and finally we moved on to installing our treads risers
45:59
and that fascia on the outsides of our stairway yep and we just need to pour some concrete and we're all set yep
46:04
exactly but before we do that we're going to move on to railing okay and if you'd like to see a video on that and a
46:10
whole lot more covering the entire deck building process you go to Trex Academy
46:15
thanks for watching
Deck Stair Pro Tips
![]() Save
Save
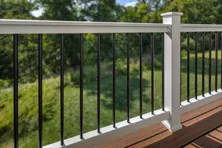
Building deck stairs is achievable as long as you take your time with it. However, any miscalculations could make the results dangerous. Here are some tips to help you avoid common mistakes when building a set of deck stairs.
- An open stringer should not have notches too deep; otherwise, the stringer will be weak.
- The stair railing posts should be firmly attached to the deck structure or the ground.
- The stair railing should include a graspable handrail in most cases.
- Stringers should be spaced close enough to adequately support the treads. This spacing depends on the tread materials. If treads are 2-by lumber, stringers can usually be as far apart as 16 inches on the center. If 5/4 decking or composite decking is used, they should be 9 to 12 inches or closer. Always check with your building department and follow the decking manufacturer's installation instructions.
Start Building Your Deck Stairs Today
Budgeting, precisely measuring, and securely fixing everything are the most important things to remember when building your deck stairs. You can’t go far wrong if you follow the above steps and stick to building codes. If you are ready to get started and are confident about tackling the project on your own, Find a Retailer and begin gathering materials. Alternatively, you could Find a Contractor and let them handle the job for you.
How to Build Box Steps for Your Deck
Learn how to build a set of box platforms to act as stairs for a low deck. You don't need to cut stair stringers.

Installing Deck Stair Railings
Ensure your deck stair railing is safe, sturdy, and code compliant with this expert DIY guide. Learn about permits, materials, tools, and the best practices for a flawless installation.
Closed Stair Risers
Learn about the benefits of installing riser boards on your deck stairs.
Glass Deck Railing Ideas and DIY Installation Tips
All glass panels used for deck railings must be safety-tempered and shatter-resistant. Learn how to install glass railing panels and get ideas for your deck.
Low-Maintenance Composite Deck Railing Options
Composite railing systems offer a low-maintenance alternative to traditional wood railings. Learn why composite is the best railing system at Decks.com.
How to Choose the Right Deck Railing
As one of the most visible elements of a deck, railings add support, safety and style. Get tips for choosing the right deck railing at Decks.com.
More Helpful Resources

Explore Articles by Topic
Footings
Information related to installing frost footings for decks
Framing
Learn structural framing methods
Decking
Learn about wood and composite decking materials
Stairs
An in-depth look at the complex issue of how to build stairs
Railings
How to install guardrails and handrails to meet IRC code
Features
An overview on water drainage, benches, planters and lights
Design
The basics of deck design
Planning
Learn about permits and working with contractors
Porches & Patios
Build a covered deck to enjoy all seasons
Ledger
Proper attachment techniques
Care
Maintain your deck to maintain your investment
Materials
An overview on water drainage, benches, planters and lights
Installing Deck Stair Railings
Ensure your deck stair railing is safe, sturdy, and code compliant with this expert DIY guide. Learn about permits, materials, tools, and the best practices for a flawless installation.
Support Long Stringers
Long stair stringers may need extra support from installing a brace at mid-span.
Stair Stringer Length
Learn how to measure the height of your deck and use our Decks.com Stairs Calculator to determine your stair stringer lengths.
Baluster Basics: Types, Installation Tips, and Deck Design Ideas to Transform Your Space
Discover everything you need to know about deck balusters, from code requirements to material options and installation tips. Explore practical advice and stylish infill alternatives to help bring your project to life with confidence.
How to Build a Deck Privacy Screen
In some deck design situations, you may feel that it is important to block certain views to increase privacy. This can usually be achieved by building a privacy wall or fence.
Low-Maintenance Composite Deck Railing Options
Composite railing systems offer a low-maintenance alternative to traditional wood railings. Learn why composite is the best railing system at Decks.com.
Explore Articles by Topic
Footings
Information related to installing frost footings for decks
Framing
Learn structural framing methods
Decking
Learn about wood and composite decking materials
Stairs
An in-depth look at the complex issue of how to build stairs
Railings
How to install guardrails and handrails to meet IRC code
Features
An overview on water drainage, benches, planters and lights
Design
The basics of deck design
Planning
Learn about permits and working with contractors
Porches & Patios
Build a covered deck to enjoy all seasons
Ledger
Proper attachment techniques
Care
Maintain your deck to maintain your investment
Materials
An overview on water drainage, benches, planters and lights