


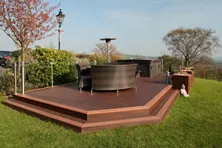
Deck Board Spacing Guide: How to Properly Space & Stagger Deck Boards
Deck board spacing is an extremely important step to build a deck. You’re nearing the end of the project and it’s normal to want to get the job done as quickly as possible. But the spacing between deck boards is critical for many reasons. One of the main reasons is to make sure you don’t void the warranty of your decking should you make a mistake at this point. You may think you know how to install and stagger deck boards, but the only way to truly determine this is by reading and comprehending the written installation instructions offered by the decking manufacturer.
Why is Deck Board Spacing Important?
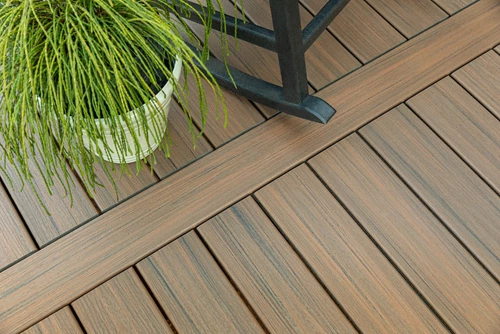
Spacing between deck boards provides a few critical functions. The primary function is to drain water from the deck. Gaps that are narrow (1/8”), can catch debris, specifically on top of the joists, and can be difficult to clean out. Larger gaps, such as 1/4”, allow more of this material to fall through the deck. Ventilation below the deck is also enhanced by the gaps between the deck boards, but this is only important in ground-level decks.
Traditional wood decking, be it treated lumber, redwood, cedar, or an exotic rain-forest species, needs to be spaced so the wood can expand and contract with changes in moisture content. Wood doesn’t expand or contract equally in all directions. For example, a 16-ft pine board could potentially shrink around 1/8 to 3/16” in length, and ¼" in width as it dries. Different wood species have different coefficients of shrinkage as they dry.
The importance of deck board spacing can’t be overemphasized. You may ask, “Why space deck boards?” Because the wood expands and contracts the greatest amount across the surface that you’ll walk on, you must be sure that you don’t create too little space that could prevent proper drainage or cause other issues. At the same time, you need to be very aware of the moisture content of the wood as you install it so that when it does dry and shrink, the spacing gap will not be too big!
Should you be working with composite decking, you have similar expansion and contraction considerations. Composite decking is made with a significant amount of plastic. Plastic expands and contracts differently than wood. Composite decking expands and contracts due to temperature changes, rather than changes in moisture.
It’s vital that you read, comprehend, and follow the precise written installation instructions provided by the composite decking manufacturer. Pay very close attention to the air temperature as well as surface temperature of the decking as you work with it.
Factors that Impact Deck Board Spacing
A major factor in deck board spacing is the size of the board. The wider the deck board, the more it’s going to expand and contract. Imagine the deck board might expand or contract just 1/8” inch across the surface where you walk. This means that, along each edge, it might shrink or expand 1/16” inch. The same is true for the adjacent decking planks. Thus, if you create just a small 1/8” inch gap when installing the boards, the gap could grow to one-quarter inch when the decking shrinks. If the decking instead expands, the decking boards could close the original 1/8” inch gap.
Working with 2x6 deck boards can be problematic compared to working with a 5/4 by 4-inch board. The 2x6 is going to expand and contract more because there’s more wood or composite decking in play. Bottom line, never underestimate the importance of proper board spacing!
Material Used
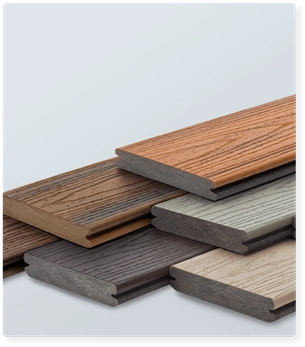
For many years, decking was primarily wood. People used redwood, cedar, pressure-treated pine and even some exotic hardwoods. Wood has some beautiful natural characteristics, but also requires considerable maintenance. Decking comes in many forms these days. There are over a hundred different man-made decking products currently on the market. Most are composed of wood-plastic composite, capped composite, vinyl, or aluminum. They offer low-maintenance benefits and a variety of aesthetic options.
These man-made materials all have very different characteristics than wood. As mentioned earlier, it is extremely important to read and follow all installation instructions when using man-made materials. Don’t assume you know what to do. Don’t hope that you’re using the correct fasteners. Check with the manufacturer to ensure you’re installing the decking the way they recommend, so everything is perfect.
Composite decking requires extreme care when installing, both in hot and cold climates. If the deck board spacing it too close, ice can build up between the boards and cause issues.
In hot climates, homeowners have complained about decking boards that hump or warp because they expand and have nowhere to go but up instead of sideways. This is a direct result of boards not being properly spaced and can easily be prevented by adhering to the written installation instructions provided by the decking manufacturer.
Deck Board Size
Decking boards are generally 5.5 to 6 inches wide and 1 to 1.5 inches thick, a size that offers stability, visual appeal, and ease of installation. For wood decking, common profiles include 2x6, 2x4, and 5/4 x 6. The 5/4 options is often milled to feature a rounded or bullnose edge. Although thicker boards like 2x4 and 2x6 provide extra strength, they are more expensive than 5/4 boards of similar width.
Most manufacturers offer composite decking boards in 12’, 16’ and 20’ lengths. The width varies by brand and style and can range from one to two inches thick and four to six inches wide.
No matter what material you decide to use, the wider the decking board the greater amount of expansion and contraction will occur. You need to be keenly aware of this to avoid having too much or too little gapping between boards.
It’s easy to avoid problems with composite decking as almost all manufactures have crystal-clear instructions as to how to install the decking no matter what the outdoor temperature is at the time of the install. They also usually recommend the best fasteners to use.
Fastener Type
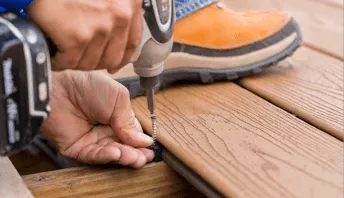
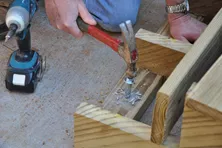
You may not realize it, but the fasteners you use to attach your deck boards have an impact on the spacing. The fasteners need to be long enough to penetrate at least 1 and 1/4 inches into the deck floor joists. If a fastener isn’t long enough, over time it can allow the decking to move and shift.
In many cases, this movement happens due to moisture issues. One way to reduce moisture issues in deck framing is to install joist tape on top of the joists before installing the decking. Without the tape, water can enter around the fastener shaft and soak into the lumber along the shaft. This water causes the wood to expand along with other issues. The wood may also contract after it dries out. But the next rainstorm will cause more opportunities for expansion.
After repeated expansion/contraction cycles, cracks can begin to develop on top of the joist radiating out of the fastener hole. If the fastener is not driven deep into the wood, the fastener can shift and so does the decking. When the shift happens, the spacing between deck boards changes and can result in structural deterioration.
Pay very close attention to the fastener type and size recommended by the decking manufacturer. It’s also a good idea to consider stainless-steel fasteners to prevent rust over time. For decks that are subject to marine conditions where salt-water corrosion is in play, stainless steel fasteners are a must.
Time of Year and Climate
When you get ready to install your deck boards, it’s important to look at the calendar, especially if you live in an area that gets a fair amount of rain or where the temperature can vary by as much as 100 degrees in a year (i.e., 90°F in the summer and down to -10°F in the winter).
Traditional wood, especially treated lumber, can have a very high moisture content as it might have just come from the treatment plant. Some treated lumber has so much treatment solution in it that when you install a fastener, liquid oozes out onto the surface of the decking. This “wet” lumber is sure to experience significant shrinkage across the face of the decking board as this liquid evaporates from the lumber over time.
Working with treated lumber in colder climates means it’s going to take many months for the wood to dry out and stabilize. You may want to measure across the face of your fresh lumber and then find a treated lumber deck that’s been down for a few years to see what those same decking boards measure. You will likely discover a difference in dimension as much as one-quarter of an inch. The measurement can help you plan for what you need to do to achieve the proper deck board spacing once the lumber is dry.
Composite decking has similar challenges, but not so much from moisture. If you install composite decking when the outdoor temperature is in the 20°F range, expect the decking to expand a bit when it’s 90°F in the summer. Once again, composite decking manufacturers know all about this and have excellent instructions about how to space the boards in all weather conditions to avoid potential issues.
How Much Space is Needed Between Deck Boards?
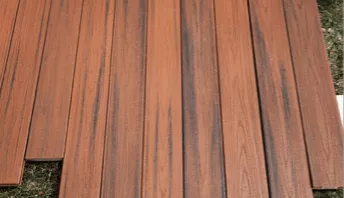
When installing deck boards, the gap should typically range from 1/8 inch (3.5 mm) to 1/4 inch (6.5 mm) when using seasoned, air-dried decking. Installing very wet, pressure treated wood without any gap, can often result in a ¼ inch gap (or more) after it dries.
The amount of space between deck boards should be anywhere from ¼” to 3/8” inch. You want plenty of space for water to flow between the boards and to allow small debris to fall to the ground.
Deck board spacing greater than 3/8” of an inch can become problematic. While women’s high heels may not be a common thing on your deck, think about the possibility.
How to Space Deck Boards
There are a few ways to approach spacing when installing deck boards. Ultimately, the goal is to have consistent spacing and for the deck boards to be in a straight line. This can be challenging if you’re using natural wood decking because, often, wood decking has a crown, meaning the edge of the deck board has a curve to it. You rarely have this issue with composite or metal decking boards.
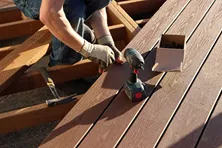
Decking spacers are something to consider. These plastic components are consistent in size and, so long as your first deck board is straight, all the others will be too if you keep the decking tight against the spacer as you install each new board.
Method: Use a Chalk Line
It’s vital that your first deck board be installed in a straight line. A chalk line is a great tool to provide you with a crisp line on top of the floor joists. Simply make sure the edge of your first piece of decking is touching the chalk line along its entire length as you install it.
Chalking a perfect line almost always requires a helper. This is especially true if you’re chalking a line over 30 feet long. Many installers find it’s best to start with the first piece of decking that’s farthest away from the house. Don’t forget to account for some overhang where the decking hangs out over the face of the outer joist that’s parallel with the first board. This overhang should be no less than ¾” inch and no more than one inch.
Mark with a pencil where the edge of the first deck board will end up on top of the joist at the two ends of the deck. Pull the chalk line out of the chalk box and hold it up in the air away from the joists. Snap it lightly in the air to get the excess chalk off the line. Failure to do this will result in a fuzzy chalk line when you do snap it.
Stretch the chalk line across the joists and hold it on the two pencil marks. Be sure it’s accurate. One person should go to the halfway point of the extended chalk line and carefully press the line down on top of a joist to hold the line in place. Then lift the line on either side one at a time to chalk the line. You’ll end up with a very crisp line.
Method: Use DIY Deck Spacers
As referenced earlier, deck spacers can help to achieve perfect spacing. If you’re installing composite decking, the fasteners recommended by the manufacturer should help to create the ideal spacing.
You can also create your own spacer using a milled or cut piece of lumber that is the exact thickness you need to space the boards. If using wood decking, be sure to take into consideration the moisture content, outdoor temperature and potential shrinkage that may occur due to natural expansion and contraction over time.
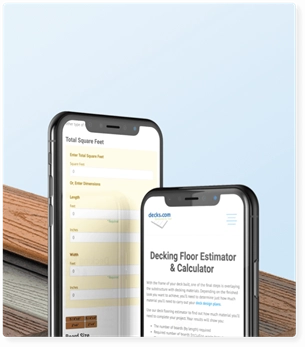
Method: Use Professional Deck Spacing Tool
A professional deck spacing tool can help to eliminate guesswork. But these tools are not universal. So, be sure to read the specifications to determine whether a tool is designed to work with your decking material.
It’s also a good idea to practice a bit to get the hang of using one of these tools. Most manufacturers offer how-to videos that show how to effectively use the tool.
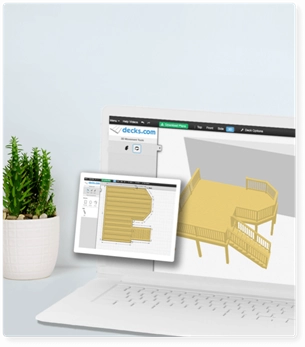
If you are not comfortable with your ability to achieve the right spacing for your deck boards, you can always enlist the assistance of a pro. Use Find a Builder to identify contractors in your area who can help.
How to Install Decking Over Existing Concrete Slab, Patio, or Porch
Discover the best techniques to build a deck over concrete, ensuring proper drainage and stability, while creating a beautiful outdoor space.
6 Best Alternatives to Wooden Decking
While wood decking was previously considered the standard material for building a deck, that’s changed. Homeowners have been exploring and embracing different types of materials, and the availability of alternative decking materials has grown significantly.

Best Hidden Deck Fasteners
Hidden fasteners create a clean deck surface and can be used with composite, wood and other materials. Learn about hidden deck fasteners at Decks.com.

How to Build Box Steps for Your Deck
Learn how to build a set of box platforms to act as stairs for a low deck. You don't need to cut stair stringers.
Building an ADA Deck Ramp
Learn how to build an ADA-accessible wheelchair ramp onto your deck to meet building codes. Ramps must have a 1:12 slope.

More Helpful Resources
Explore Articles by Topic

Footings
Information related to installing frost footings for decks

Framing
Learn structural framing methods
Decking
Learn about wood and composite decking materials

Stairs
An in-depth look at the complex issue of how to build stairs
Railings
How to install guardrails and handrails to meet IRC code

Features
An overview on water drainage, benches, planters and lights

Design
The basics of deck design
Planning
Learn about permits and working with contractors

Porches & Patios
Build a covered deck to enjoy all seasons
Ledger
Proper attachment techniques

Care
Maintain your deck to maintain your investment
Materials
An overview on water drainage, benches, planters and lights

What to Consider When Building A Wrap-Around Deck
Looking to add a wrap-around deck to your home but unsure of what the process involves? Check out this guide to learn more about top considerations when building a wrap-around deck.
Picture Frame Decking
Install a picture frame or perimeter board to finish the edge of your deck with style.


Installing Deck Stair Railings
Ensure your deck stair railing is safe, sturdy, and code compliant with this expert DIY guide. Learn about permits, materials, tools, and the best practices for a flawless installation.
Anchoring Deck Stairs
Learn how to anchor your deck stairs to a concrete landing pad or footings. Follow our step-by-step instructions with photos.

Planning to Land Stairs on a Future Patio
Learn how to determine the location of your stair landing and how to install a concrete slab using forms. Follow these step-by-step DIY instructions.
Explore Articles by Topic
Footings
Information related to installing frost footings for decks
Framing
Learn structural framing methods
Decking
Learn about wood and composite decking materials
Stairs
An in-depth look at the complex issue of how to build stairs
Railings
How to install guardrails and handrails to meet IRC code
Features
An overview on water drainage, benches, planters and lights
Design
The basics of deck design
Planning
Learn about permits and working with contractors
Porches & Patios
Build a covered deck to enjoy all seasons
Ledger
Proper attachment techniques
Care
Maintain your deck to maintain your investment
Materials
An overview on water drainage, benches, planters and lights