


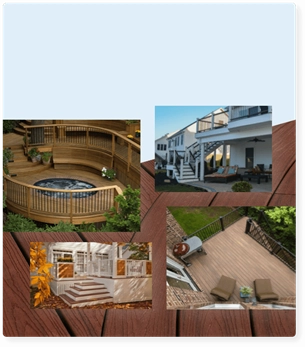
Installing a DIY Under-Deck Drainage System
If your deck is elevated, especially if it’s a second-story deck, consider installing a DIY under-deck drainage system. It prevents water from passing through the deck and pooling below., Instead, the water flows into gutters so that the area beneath the deck stays dry and useable.
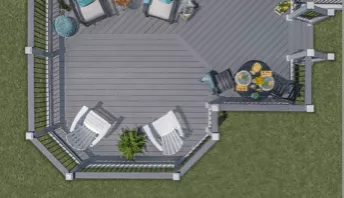
If you’re building a new deck on your home, get the most from your investment with an under-deck drainage system. After installing it, you can convert the space below the deck into a patio or use the space as waterproof under-deck storage.
Trex RainEscape, named among the Remodeler's Choice 100 by Qualified Remodeler Magazine, is simple to install and affordable. It is an over-the-joist deck drainage system, meaning it’s installed before you lay the deck boards. This type of deck drainage system allows you to finish the underside of the deck (the ceiling of the patio below) with lights, ceiling fans, and other accessories.
What to Consider before Installing an Under-Deck Drainage & Gutter System
Deck drainage and gutter systems can be installed above or below the joists. Above-the-joist systems like Trex RainEscape shield the entire substructure from water, protecting joists and fasteners against rot and corrosion.
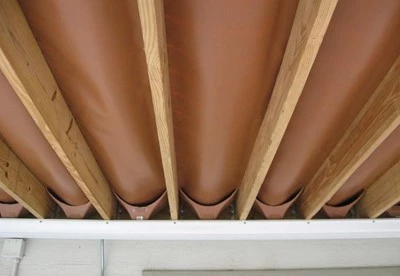
Under-deck gutter systems that use below-the-joist panels can offer no such protection because some water always contacts the joists. In fact, the panels can accelerate decay by trapping moisture in the joist bays. Rotted wood can even fall onto the panels, impeding the flow of water and exacerbating the problem.
Plus, every below-joist approach, be it a retail kit or a DIY under-deck drainage system, makes it difficult if not impossible to install lights, fans, or other electrical accessories in the ceiling below the deck. With an above-joist under-deck drainage system that keeps the joist bays dry, there are fewer limitations.
Tools & Materials Needed for a DIY Under-Deck Drainage System
- Tape measure
- Marking pen
- Utility knife or scissors
- Staple gun
- Caulk gun
- Trex RainEscape downspouts
- Trex RainEscape troughs
- Trex RainEscape butyl tape
- Trex RainEscape butyl caulk
- Trex RainEscape rubber wall flashing
- Trex RainEscape 4x4 post flashing
- PVC, aluminum or steel gutter
- Hacksaw or jigsaw
- Cordless drill/driver
- Self-drilling screws
- Gutter hangers
- Gutter downspout
- Optional: Trex RainEscape Soffit Lights, ceiling fan, or other accessories
How to Waterproof under Your Deck with a DIY Deck Drainage System
Follow these installation basics for waterproofing the space under your deck using troughs that run between joists and empty into the system’s downspouts. If your deck has unusual angles, oddly spaced joists, railing posts inside the framing or other special cases, you’ll need to modify the troughs and downspouts to fit the space, but the approach is pretty much the same: Install the troughs and downspouts so that water flows to the gutter, then completely cover all joints with butyl tape.
This video provides instructions on how to install an under deck drainage system on a second story deck.
A deck drainage system is designed to direct water away from your deck and into a gutter system below the deck. In this video, we're installing Trex® RainEscape®, which is an over-the-joist system. This type of deck drainage system covers and protects the entire wooden substructure. It can be installed on a new composite or wood deck during construction.
The Trex® RainEscape® deck drainage system includes four main components: downspouts, 12-foot or 16-foot trough material, 4-inch butyl tape, and caulk. The tools you'll need to install the system are: a staple gun and regular staples, a caulk gun, and a utility knife.
Before you begin, there are four important factors to consider before you frame your deck:
- Where do you want the gutter line located?
- What type of railing will you use?
- Will you use a double, or single picture frame, or a divider board?
- Will the deck have any double or triple beams?
Your answers to these questions will determine how the Trex® RainEscape® system is installed.
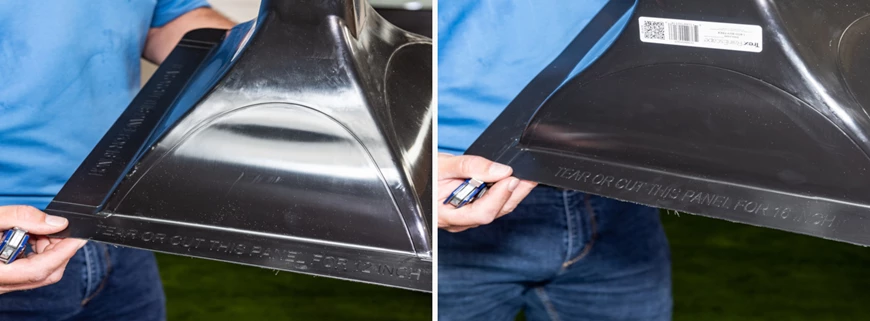
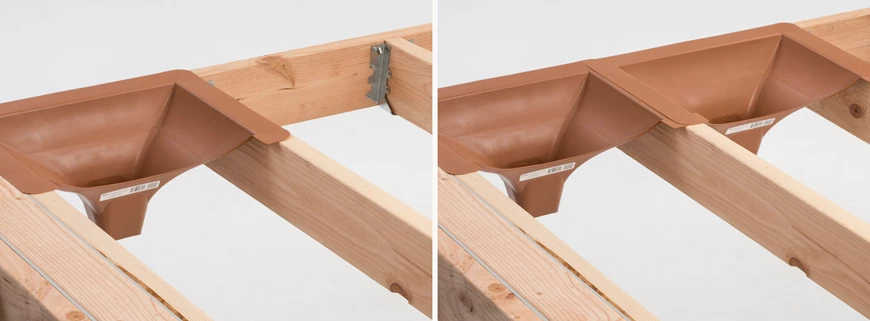
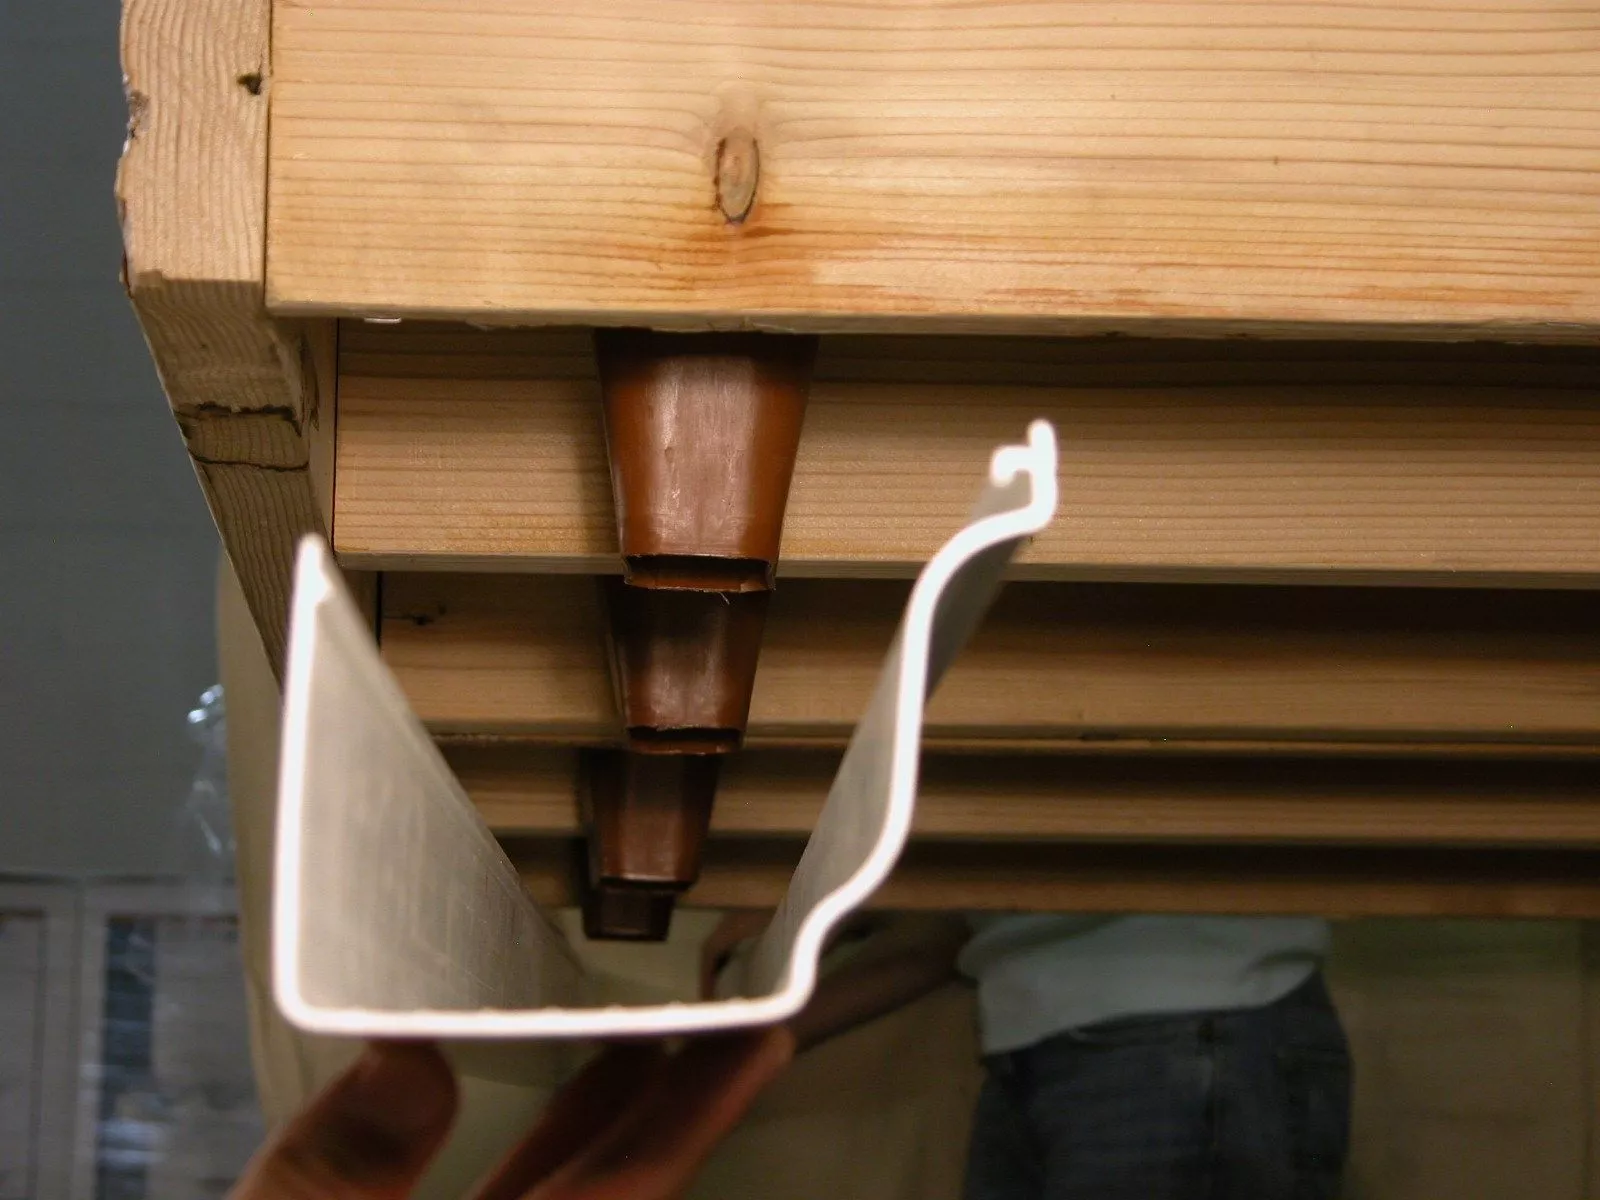
The first step in installing an under-deck drainage system is to install the downspouts. The downspout is designed for 12-inch or 16-inch joist spacing. Each bay has one downspout. The downspout is 10 inches tall and the perfect height for a 2x10 joist. To install a downspout, cut the pre-scored marked guideline on the downspout with a utility knife. Install the downspout along the rim joist (or the ledger board), making sure the cut side is facing the deck bay. Staple the downspout into place.
The downspout funnels water into a standard 5-inch gutter below the deck. The funnel nozzle of the downspout hangs at least one inch into the gutter line. The funnel can also be extended down for 2x12 LVL or I-joist. The downspout can also be trimmed to fit a smaller size joist such as a 2x6 or 2x8.
Now that the downspouts are installed, it's time to install the trough material. If you're installing the Trex® RainEscape® system in a climate with fluctuating temperatures, the trough should be acclimated before installation. This is especially important when using the black trough.
There are two methods to acclimate the material. The first is to fold a soft crease lengthwise down the center of the trough. This relaxes the trough material and creates a "V" down the middle so that the trough is easier to install. The second method is to simply unroll the trough material and let it sit for a while to acclimate to the outdoor temperature.
If you plan on blocking between the joists, use blocking that is shorter than the joist height. The Trex® RainEscape® system hangs down a maximum of 4 inches, so at the mid-span, the trough will hang down 2 inches; which allows the blocking underneath.
If you're installing the system 12 inches on center, measure and cut 4 inches off the width of the trough roll on the side that has the 1 and 1/2 inch score mark. Align the left edge of the trough with the outside of the joist. The smooth, shiny side is always installed facing upwards. To install, slide the trough underneath the flashing, and make sure the trough edge sits on top of the ledger board. Staple the trough at the ledger board on the 1 and 1/2 inch score mark side. Unroll the trough halfway down the joist, and put a second staple on the same side. If possible, have a second person hold taut the loose corner of the trough. Unroll the trough down the rest of the way, and add a third staple on the same side.
Trim the trough making sure it's about midway across the funnel. Push the trough down into the opening of the funnel. Align the opposite side score mark to the inside of the joist and staple. With the second person still holding the loose corner of the trough, work your way back to the starting point by stapling on both joists in a zig-zag pattern.
After installing the first trough, continue to the left and install the next. The 1 and 1/2 inch score mark side of the trough should be underneath the adjacent trough material. The trough material must cover all of the exposed wood of the deck frame.
After the trough panels are installed test to ensure the slope is correct. Pour water on the material at the ledger board the water should run down to the downspout.
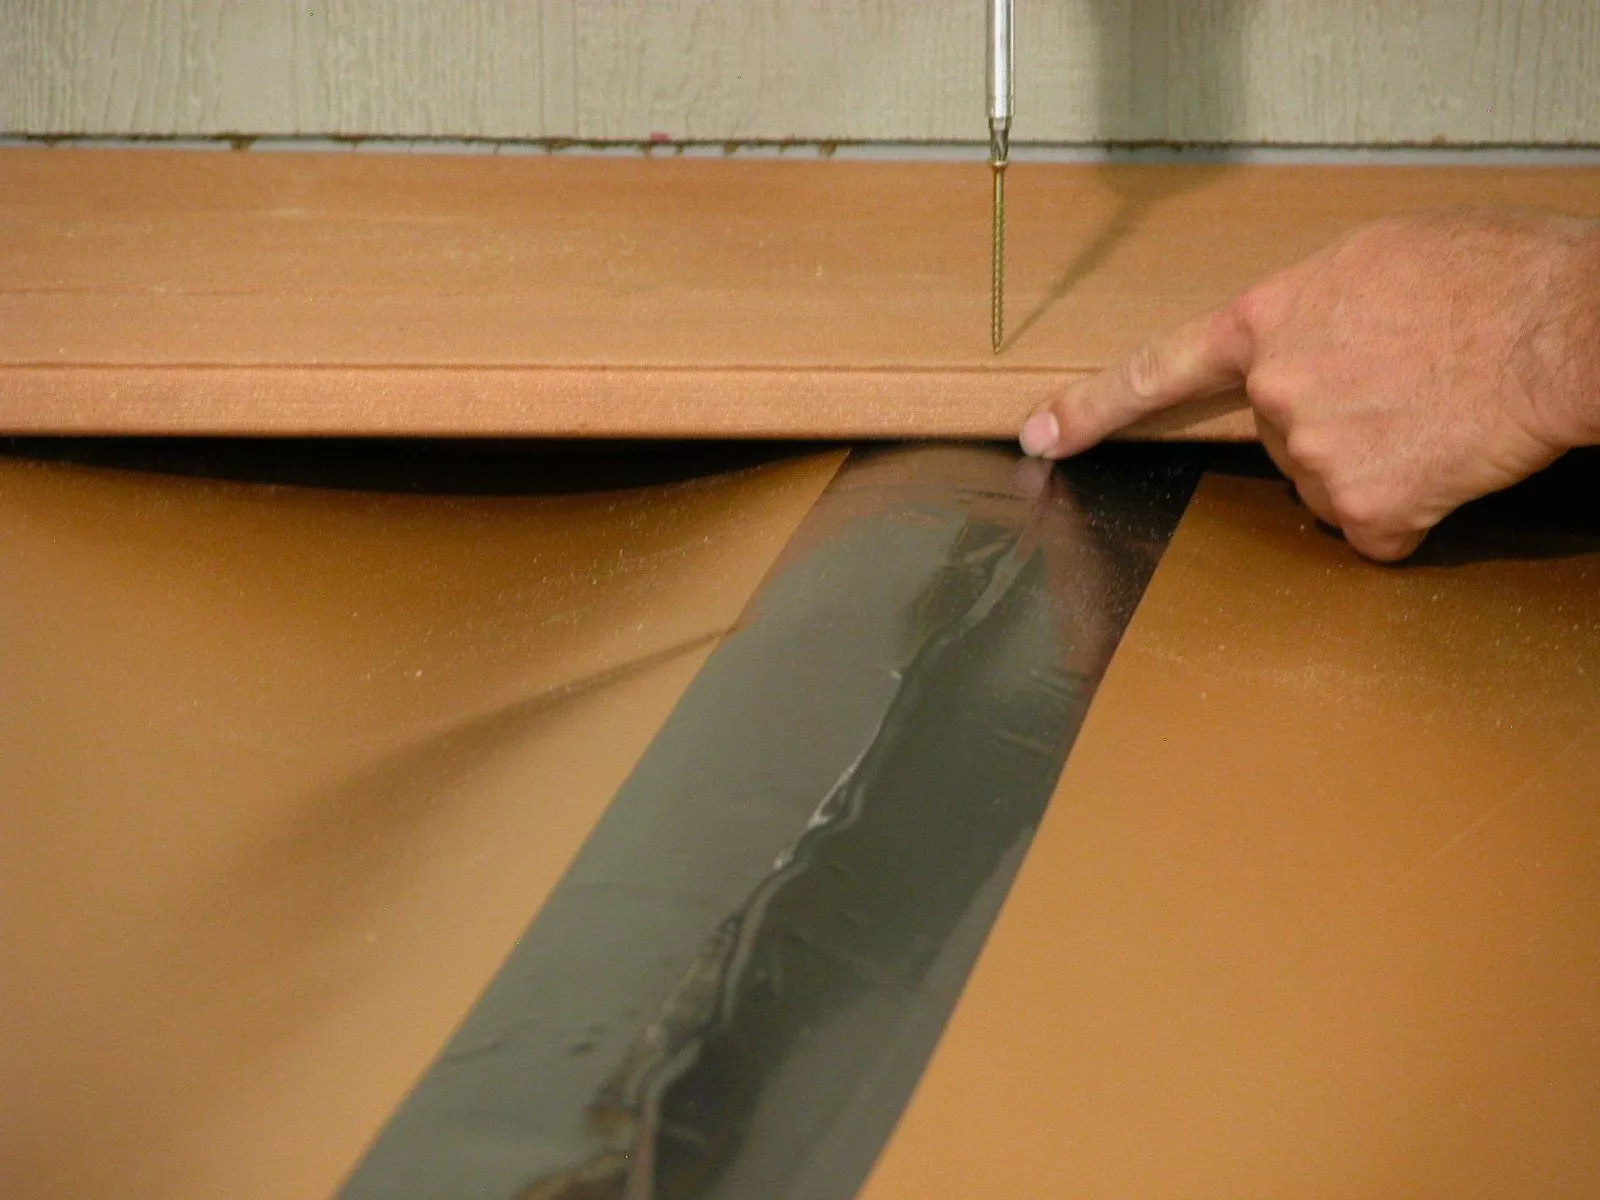
Now, seal the troughs. Trim excess trough material at the seams, but keep the overlap of the trough material. Use the Trex® RainEscape® butyl tape to seal the trough seams on top of the joists. Peel the non-stick backing off the tape, and apply the tape on top of the joists. The tape does two things: it covers the overlapping trough layers, preventing wicking, and also seals around the screws used to fasten the decking.
The butyl tape should never be put directly on wood. Apply it only on top of the trough material. Use a utility knife to cut a small 1in. x 3/4in. tab where the trough meets the downspout. Fold this tab straight down. The tab prevents water from waking up underneath the trough and leaking outside the funnel. The trough should be smooth and with minimal wrinkling. If you find the water does not release properly, use a screened spline roller to create a V-shape. The V-shape will help to properly drain the water.
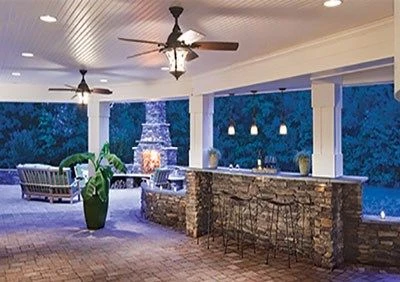
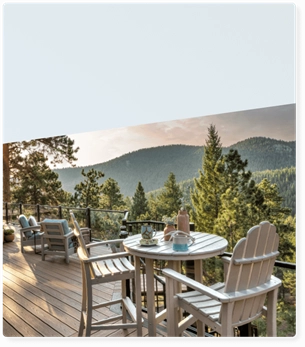
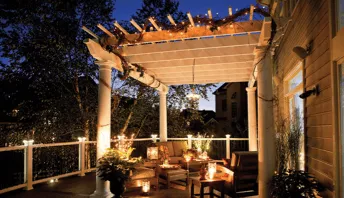
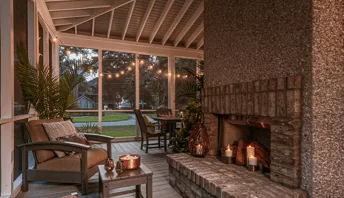
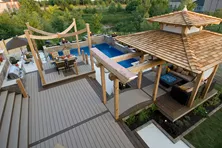
The benefit of installing an over-the-joist deck drainage system, like Trex® RainEscape®, is that the area below the deck is dry and usable. With drainage taken care of, you can finish the space below the deck by adding an under-deck ceiling and utilities for soffit lights, ceiling fans, outdoor cooking, relaxing, or gathering your friends to watch the big game on your outdoor TV. You can also use the space for much needed storage. Whatever you choose to do, installing a deck drainage system on your elevated deck is the first step in creating an outdoor oasis you'll enjoy for years to come.
Trex RainEscape is installed over the joists before the decking boards are installed, ensuring no water touches the joists. This protects the deck structure and foundation from water, prolonging the deck’s service life.
Some homeowners ask how to waterproof under an existing deck. This is not recommended, as it requires a system installed below the joists. Such below-joist deck drainage systems allow water to run through the deck boards, over the joists and into gutters under the deck. This repeatedly exposes the wooden joists to water and causes them to rot.
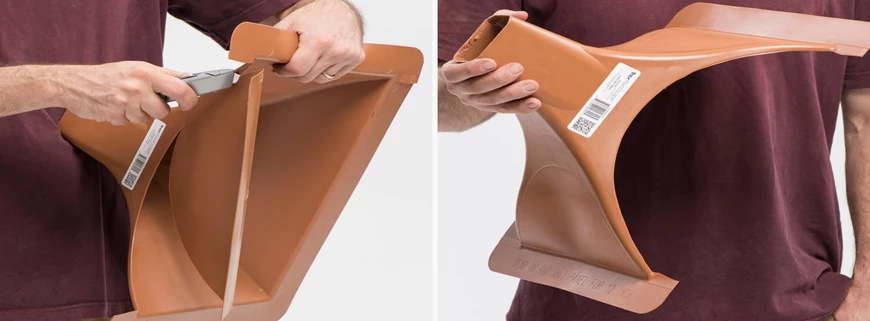
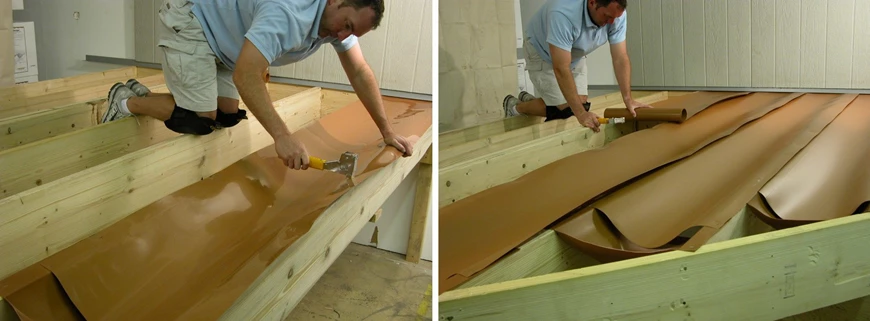
Cut your downspouts and install them along one rim joists
The RainEscape funnel-like downspouts fit between joists spaced 16 inches on center and, when turned 90 degrees, joists 12 inches on center. They can also be adapted to fit oddly spaced joists.
1. At 10 inches tall, the downspouts fit well with 2x10 joists. If your joists are smaller, cut the outlets of the funnels so that they extend 1 inch into the gutter. If you have 2x12 joists, add a section of PVC downspout to the funnel outlet using self-drilling screws. Next, cut a crescent-shaped section from one side of the funnel using a utility knife. Just follow the indicated cutline. Position a downspout in each joist bay at the rim joist where you will put the gutter, and staple them in place.
Slide one end of the trough under the wall flashing
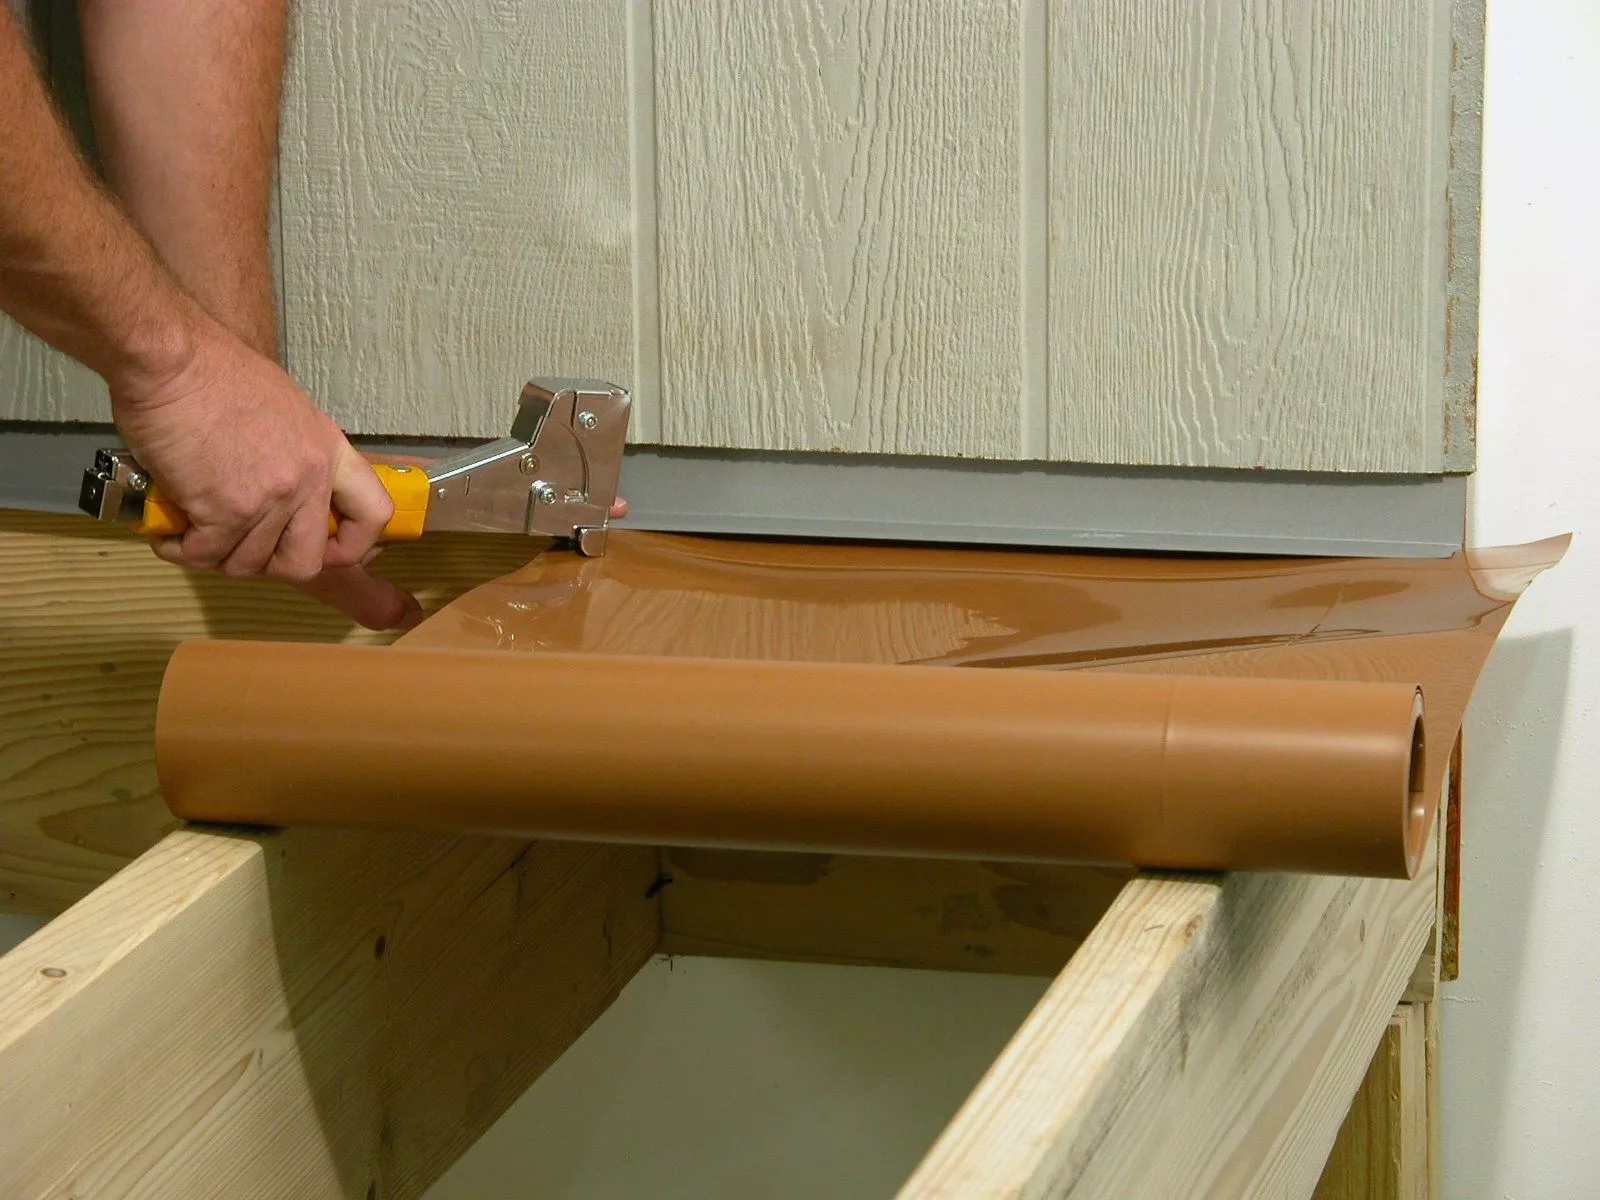
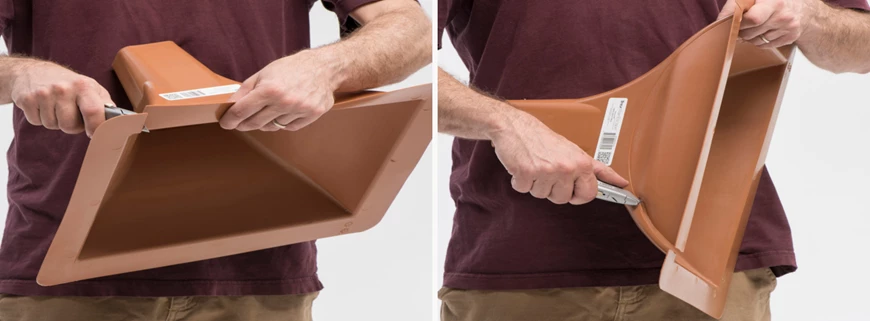
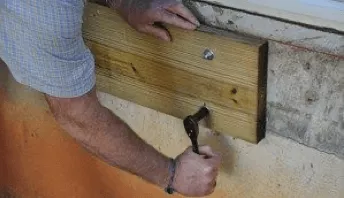
2. Unroll a trough panel and allow it to acclimate (relax). Then fold it in half lengthwise to create a crease. This will help to form a trough for the water to travel along. Slip one end the material under the ledger flashing as far as possible, and staple it in place. Do not staple the flashing.
Staple and cut the trough to length
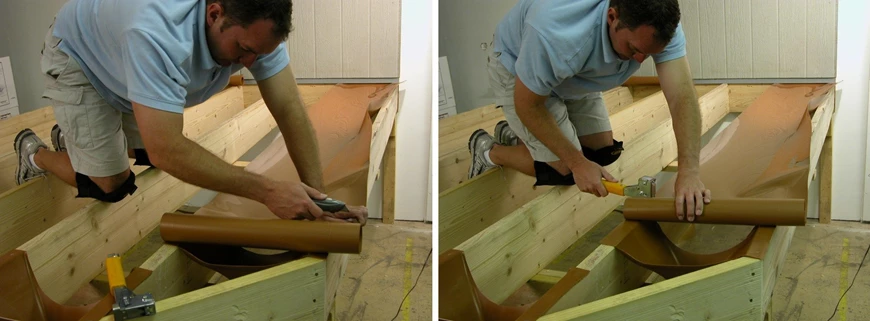
3. Staple one edge of the trough panel over the top of a joist so that it’s flush with the joist edge. Keep the trough taut as you staple it. (Have an assistant hold the other side of the trough at the ledger end to make the job easier.) When you reach the downspout, fold the material back tightly to remove its “roll memory.” Then cut it to length, with the end falling near the center of the downspout hole.
Staple and roll out more trough
4. Following the guideline on the panel, continue stapling both sides of the trough. This will automatically create a slight slope for water to run down. Continue installing the trough panels in the other joist bays. Pour a cup of water into each trough to verify it drains properly.
Fill in the small areas at the angles
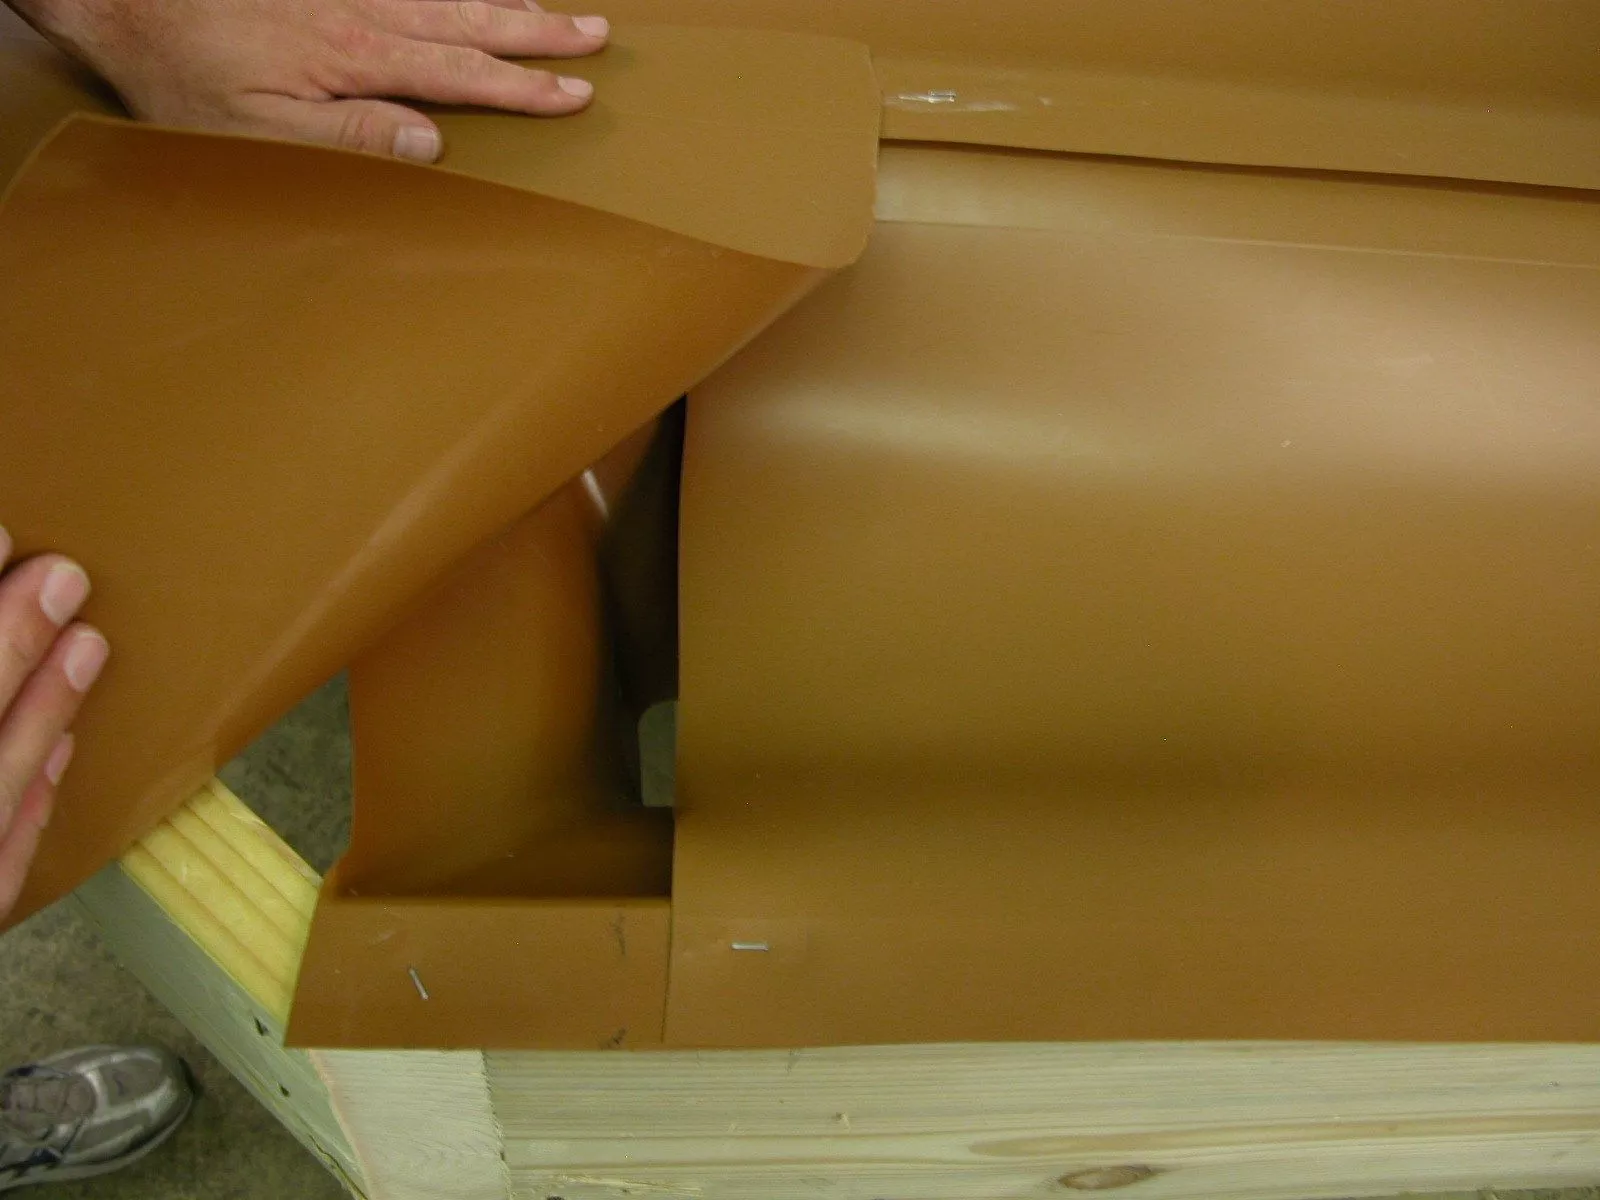
5. If there are angles or cantilevered sections of deck that cannot accommodate a downspout, make short trough sections and back-pitch them so that water flows to the longer trough and into the funnel downspout.
In difficult-to-tape places, it’s ok to use butyl caulk instead of, or in addition to, the tape. Make sure to apply it in a continuous bead.
Cover the staples and joints with butyl tape
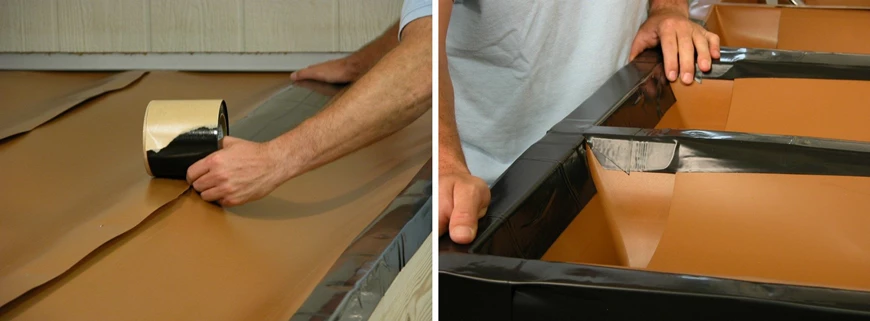
6. Use a utility knife or scissors to cut away excess overlapping trough material without exposing bare wood. Starting at the house end and working toward the downspouts, apply the butyl tape over the stapled trough ends by removing the paper backing as you unroll and apply it. Work carefully to keep the tape from wrinkling, and press down firmly so it forms a tight seal at all points.
Next, apply the tape along the outside edge of the downspouts. Slit the tape as needed to keep the seal flat. Press all the pieces smooth and tight. If you aren’t sure a joint is well sealed, apply more tape.
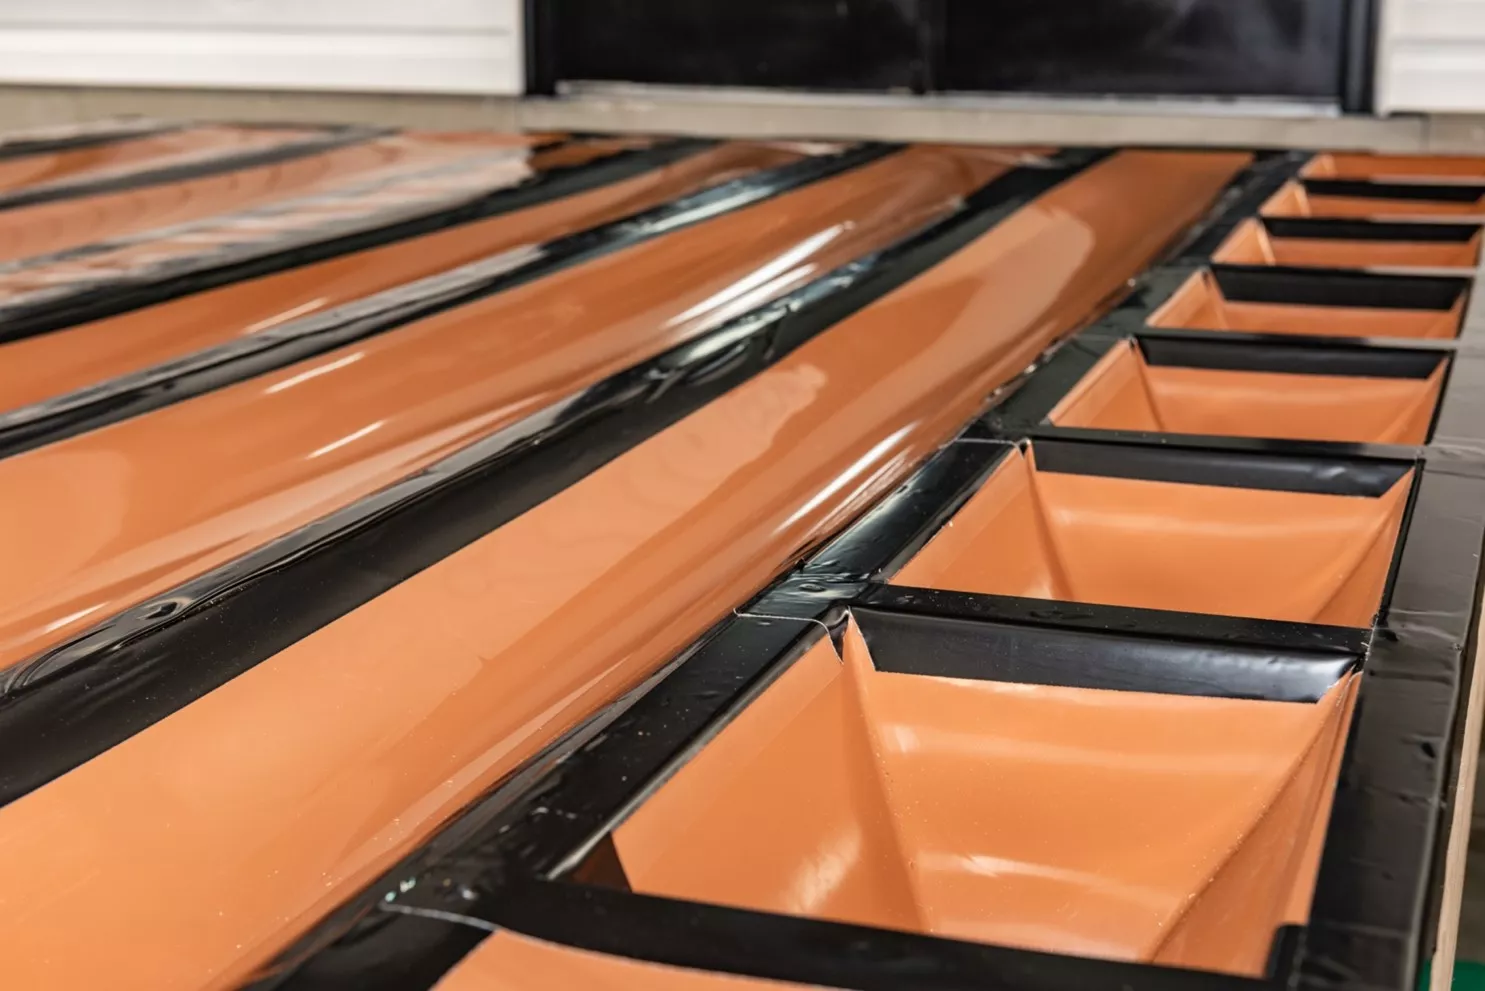
Nice and dry!

7. If you plan to install Trex RainEscape Soffit lights, a fan or other ceiling elements, you can do so now. Since this is an over-the-joist deck drainage system, all spaces below the deck stay dry.
Install the under-deck gutter
8. Install a gutter--PVC, aluminum or steel---so that it aligns under the downspouts, with each downspout’s outlet extending 1 inch into the gutter. The gutter should be slightly sloped—1/8 inch per foot is typical—so that the water runs toward to the gutter’s downspout.
Install the decking
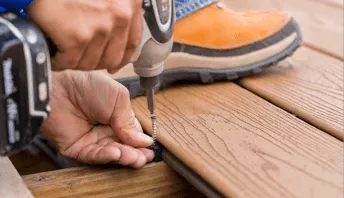
9. You can install the decking by face-screwing it or using hidden fasteners. The Trex RainEscape butyl tape forms a watertight seal around the screws as they penetrate the tape. Do not use nails to attach the deck boards.
Is a Deck Drainage System Worth It?
An under-deck drainage system that keeps the area under your deck dry gives you a new space to store belongings and/or enjoy the outdoors. It also increases the value of your home. Plus, by protecting the structural joists from water, the system extends the service life of your deck. Few home improvements can provide such a big payoff for so little investment.
Get Started on Your Under-Deck Waterproofing Project
An under-deck drainage system that installs above the joists is the best option. It enables you to add overhead lights and ceiling fans in the space below the deck and doesn’t endanger the structural integrity of the joists above because they never see water.
Click here to find a contractor who can install an under-deck drainage system on your elevated deck.

Deck Skirting
Skirting can be an attractive feature that can be added to any low-level deck.
What Does it Cost to Build a Second Story Deck?
Interested in an elevated deck but asking yourself how much does a second story deck cost? Learn the cost to build a second story deck here.

How Trex Turns Plastic Into Sustainable Outdoor Furniture
Learn how Trex Outdoor Furniture turns discarded plastic into stylish, long-lasting furniture.

Decking Patterns
Step into the world of deck design and push the limits of your imagination with our collection of deck patterns and ideas. From classic single-width and diagonal layouts to intricate herringbone and chevron designs, we illustrate the wide range of patterns that will unlock your creativity.

Deck & Patio Landscaping Ideas
Looking for landscaping inspiration and ideas? Check out our ideas for turning your patio or deck into a beautiful oasis for entertaining and relaxing.
Deck & Patio Furniture Buying Guide
Interested in buying furniture for your deck and don’t know where to start? Learn how to choose the best deck & patio furniture with our buying guide.
More Helpful Resources

Explore Articles by Topic
Footings
Information related to installing frost footings for decks
Framing
Learn structural framing methods
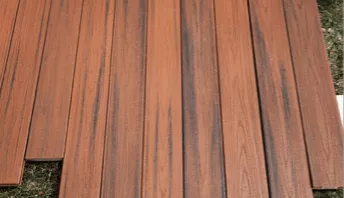
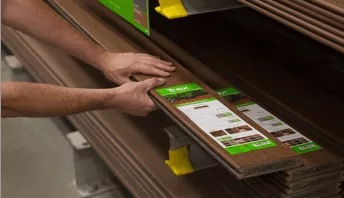
Decking
Learn about wood and composite decking materials
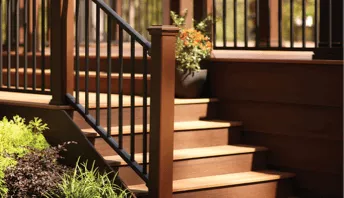
Stairs
An in-depth look at the complex issue of how to build stairs
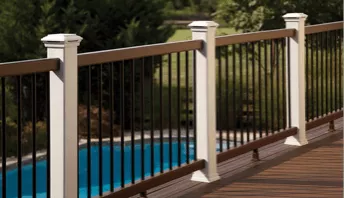
Railings
How to install guardrails and handrails to meet IRC code
Features
An overview on water drainage, benches, planters and lights
Design
The basics of deck design
Planning
Learn about permits and working with contractors
Porches & Patios
Build a covered deck to enjoy all seasons
Ledger
Proper attachment techniques
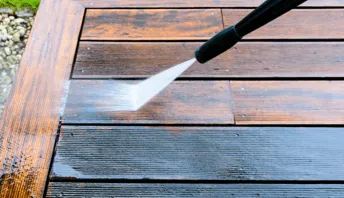
Care
Maintain your deck to maintain your investment
Materials
An overview on water drainage, benches, planters and lights

5 Best Ways on How to Hide Trash Cans Outside
Outdoor trash cans can be an unwanted eyesore. Discover how you can easily cover them up and add an extra touch of beauty to your yard.
15 Pergola Ideas to Create a Backyard Oasis
Pergolas can add style and shade to your backyard. Get inspired on how to create a backyard oasis with these pergola design ideas.

Our Favorite Outdoor Deck Lighting Ideas
Brighten up your outdoor living space and learn how to incorporate lighting fixtures into your deck to enhance your entertainment area.

Pool Deck Ideas on a Budget
A stylish poolside retreat doesn't have to come with an over-the-top price tag. Allow us to show you some easy and innovative ways to build a stunning pool deck that won't empty your wallet.
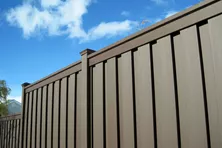
10 Fence Ideas to Add Privacy and Style to Your Yard
10 Fence Ideas to Add Privacy and Style to Your Yard

Best House and Deck Color Combinations
Whether you’re adding a deck to your home, repainting your deck, or refreshing the exterior of your home, it’s important to consider all the different design choices you have available to you, so you can choose one that makes your neighbors do a double take (in a good way!)
Explore Articles by Topic
Footings
Information related to installing frost footings for decks
Framing
Learn structural framing methods
Decking
Learn about wood and composite decking materials
Stairs
An in-depth look at the complex issue of how to build stairs
Railings
How to install guardrails and handrails to meet IRC code
Features
An overview on water drainage, benches, planters and lights
Design
The basics of deck design
Planning
Learn about permits and working with contractors
Porches & Patios
Build a covered deck to enjoy all seasons
Ledger
Proper attachment techniques
Care
Maintain your deck to maintain your investment
Materials
An overview on water drainage, benches, planters and lights